This post may contain affiliate links. Please read our disclosure policy.

We’re back together with another Cooking Lesson – our series of occasional, instructional posts that will provide you with more details, as well as step-by-step photos for some of the cooking techniques we use in our recipes! Today’s Cooking Lesson is how to make Perfect Pizza Dough!
So many great cooks are afraid to make their own pizza dough – afraid that the dough will come out too tough to eat, or the dough becomes too wet or too dry. Or maybe the yeast in the dough doesn’t activate – or sometimes it activates too much. So we’re thrilled today to be sharing a pizza dough recipe that is really quite fantastic! Although the recipe is lengthy – this is actually a beginner-friendly pizza dough because it’s very easy to work with.
This perfect pizza dough bakes up into crust that is crisp and chewy at the same time – and if you follow our recipe, we promise you’ll be making pizza at home that rivals some of the best pizzarias around!
One thing to note before we get started: This pizza dough should be made a day ahead of when you plan to bake your pizzas. We’ll get into more of the ‘why’ below – but this extra time will ensure that your finished pizza crust will be perfectly light, crispy and chewy!
Let’s get started! In the bowl of a stand mixer with the paddle attachment, mix the dry ingredients together so that they are combined. Then, with the mixer on low speed, slowly pour in the liquid until the dough starts to come together.
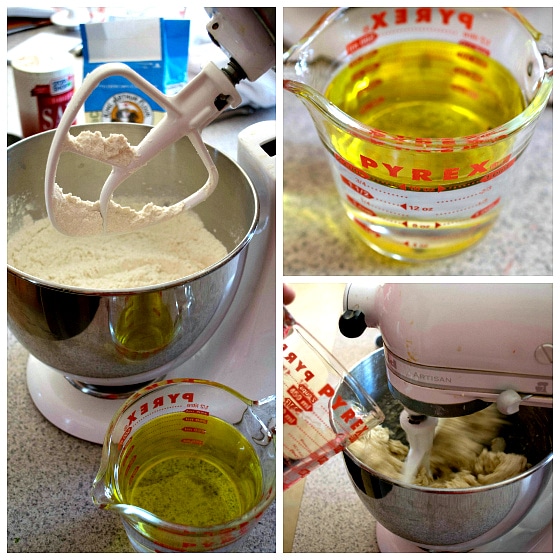
Change to the hook attachment on your mixer, and begin to knead the dough. Important Step: As you start this process, you want to see the bottom of the dough ball sticking to the bottom of the bowl of the mixer and stretching around the hook so it will knead correctly. If the dough is balling up around the hook – it is too wet and you will need to add more flour. If the dough is breaking up and not stretching – it is too dry and you will need to add water (a little at a time) until you get the correct consistency.
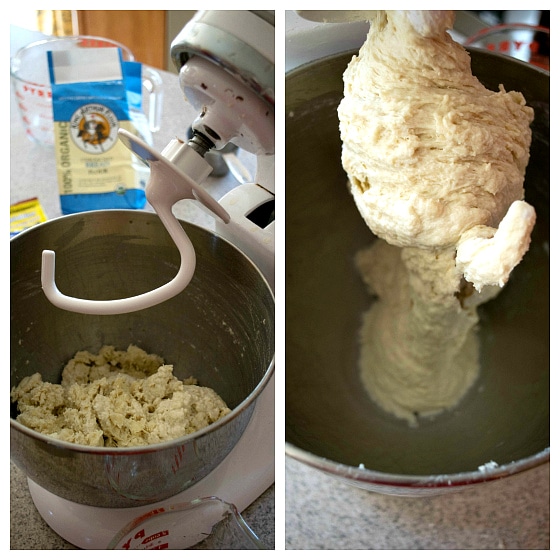
Here’s a brief video of what you want your dough to look like as it is kneaded by the dough hook in the bowl.
Once the dough has been kneaded, on a floured surface, form the dough into a smooth ball. Then cut the dough in half, and form each half into an oblong shape.
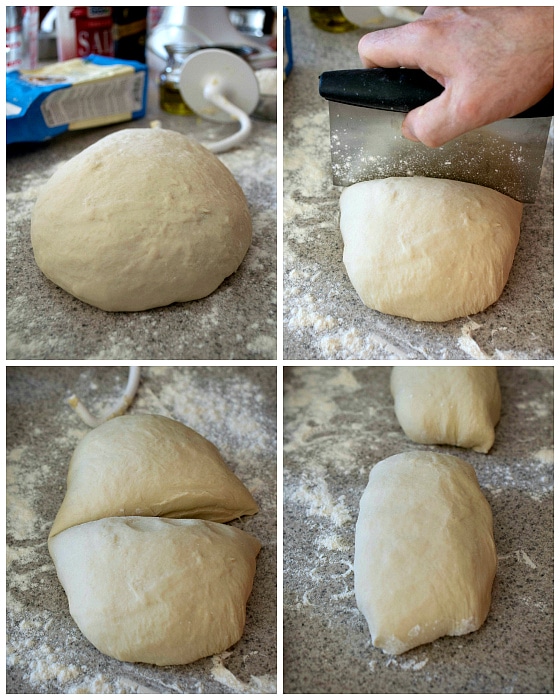
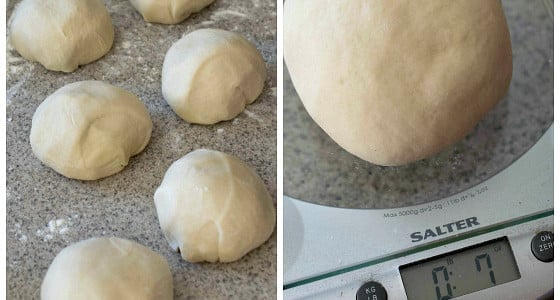
Cut each oblong dough into three equal pieces – each about seven ounces in weight.
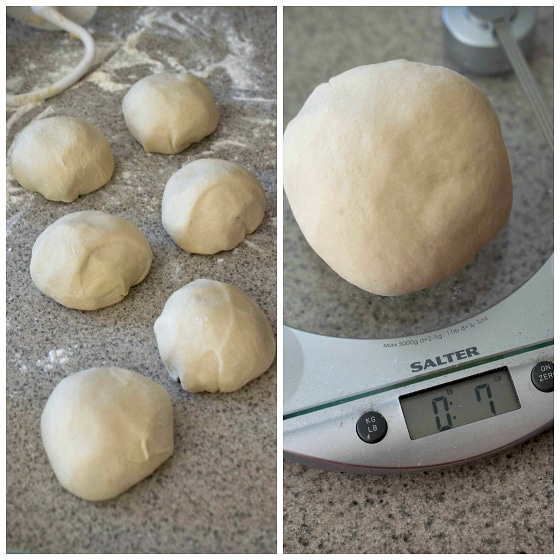
Next, brush a piece of parchment paper with a light coating of olive oil. Then place each dough ball onto the parchment and brush the dough with the oil – coating completely.
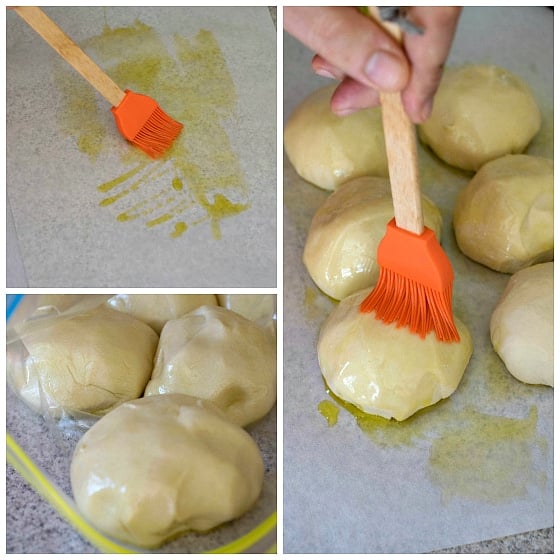
At this point, the pizza dough needs be refrigerated to rest overnight*. This refrigeration process allows the gluten in the dough to form without allowing the yeast to activate too much. This step is important in giving the baked pizza crust that perfect crisp but chewy texture. *If you would like, you can freeze the dough balls at this point for later use. Wrap each ball individually in plastic wrap before freezing.
When you are ready to bake your pizza, take the dough out of the refrigerator. Cover and allow the dough to sit for two hours.
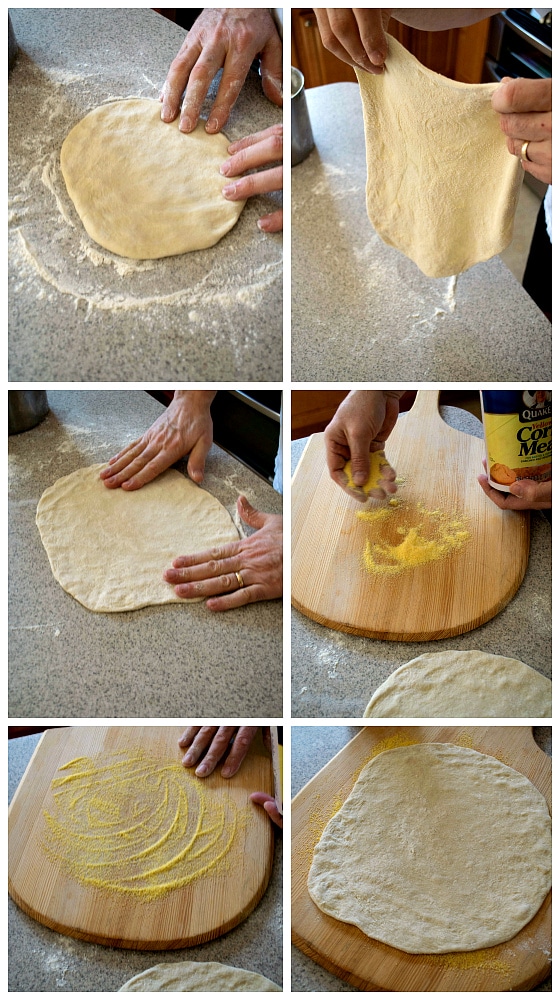
Once the two hours are up, press and stretch the dough into a round. Sprinkle a pizza peel with corn meal and spread it evenly. Place the dough over the corn meal and you’re ready to add the toppings of your choice before baking!
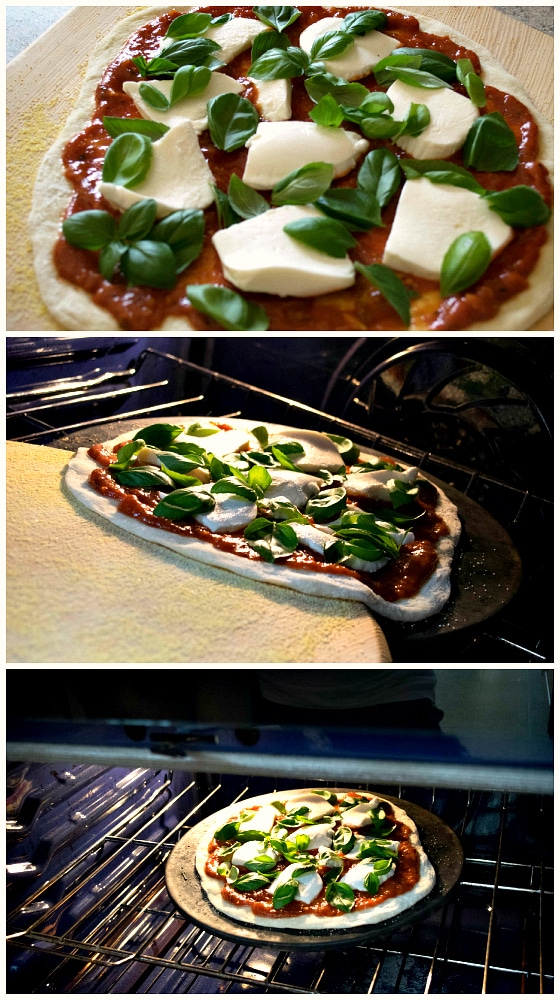
We highly recommend using a pizza stone to bake your pizza. The pizza stone should be placed in the oven while the oven fully heats up. Using the pizza peel, just slide your pizza onto the hot pizza stone to bake.
Recipe adapted from The Bread Baker’s Apprentice: Mastering the Art of Extraordinary Bread. See below for links to some delicious pizza recipes.
Disclosure: This post contains affiliate links.
We love seeing what you made! Tag us on Instagram at @afamilyfeast or hashtag #afamilyfeast so we can see your creations!
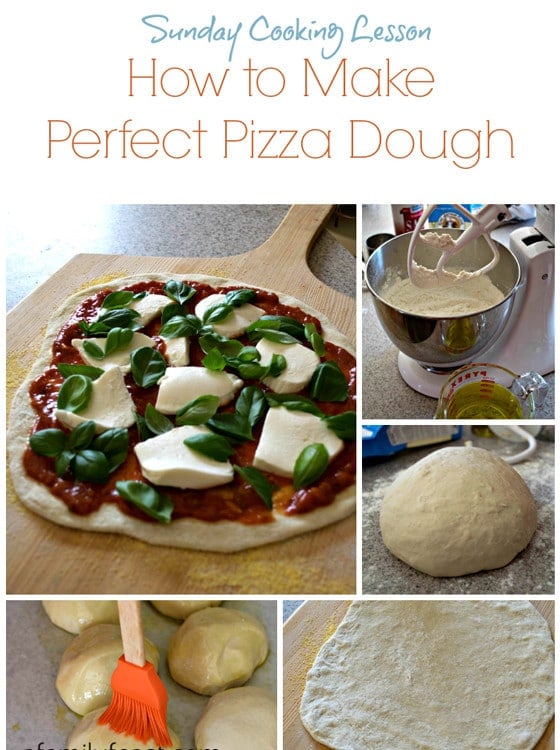
Sunday Cooking Lesson: Perfect Pizza Dough
Note: This is a two day process but the end results are amazing! In order to activate the gluten but not allow the yeast to activate, you must use ice cold water and flour and let the dough sit overnight in your refrigerator. (For the best quality dough, refrigerate the flour and water for one hour before beginning.) The reason the dough needs to be as cold as possible is so the yeast does not activate until the next day when you are ready use the dough. This delayed fermentation technique is called L’ancienne – and using a small amount of yeast in this recipe allows the dough to leaven without eating up all the sugar during fermentation. As well this recipe uses olive oil to tenderize the dough. The result is a thin golden crust that is crispy on the bottom and edges but still chewy and tender. Pizza dough perfection!
Ingredients
- 4 1/2 cups cold bread flour
- 2 teaspoons salt (use table salt not Kosher)
- 1 teaspoon instant yeast
- 1/4 cup extra virgin olive oil, plus more to coat dough balls
- 1 3/4 cups ice cold water
- All-purpose flour for dusting
- Corn meal to dust the pizza peel
Instructions
- In the bowl of a stand mixer, sift in cold flour, salt and yeast. Place paddle onto mixer and mix to incorporate dry ingredients.
- In a 2 cup measure, fill to 1 ¾ full with the ice cold water then bring up to two cups with the ¼ cup of the oil.
- Turn the mixer on low and slowly but steadily add in the full two cups of the liquid. Once the dry and wet are together and a dough starts to form, replace the paddle with a dough hook and turn to medium.
- The dough should just stick to the bottom of the bowl as it turns and not come up off the bottom. If too wet, add a little flour. If too dry, add a little water. Once you have it perfect, keep the speed on medium and knead for six minutes.
- Remove the dough to a floured surface and with a knife, dough cutter or bench scraper, cut into six equal pieces. They should each be seven ounces, give or take a little.
- Lay out a piece of parchment paper and brush with olive oil to coat. With your hands, form each piece of dough into a rough ball. Place each dough ball on parchment and brush the tops and sides of each ball with more olive oil.
- Place all six balls into a gallon zip lock bag and place in the refrigerator overnight.
- Note: At this point, you can freeze any dough balls you do not plan on using the next day by sealing them in sandwich sized zip lock bags and freezing for up to three months.
- Two hours before you plan on cooking your pizza, remove the dough balls from the refrigerator, flatten to ½ inch thick and about five inches in diameter. Place on a floured surface (does not have to be very warm like it would to rise bread dough, just room temperature). Brush or mist with olive oil and cover with plastic wrap then a towel and let sit for two hours.
- Forty five minutes before making pizza, heat oven to its highest temperature and place a pizza stone in the center of the oven. (A pizza stone is crucial to a perfect pizza however if you do not own one, place an upside down sheet pan in the oven and use that as your stone.). The oven and the stone need to be the hottest you can get them.
- When you are ready to cook, using a bench scraper, scrape up one dough ball at a time and place on a floured surface. Dip your hands in flour and using a circular motion, flatten the dough and stretch until it is about eight inches. If the dough stretches back, cover it with a towel and let it sit for ten minutes to relax the gluten. If you are comfortable flipping in the air to stretch to the final size, do that now or use a rolling pin to get the dough to your perfect size and thickness, between 9 and 12 inches.
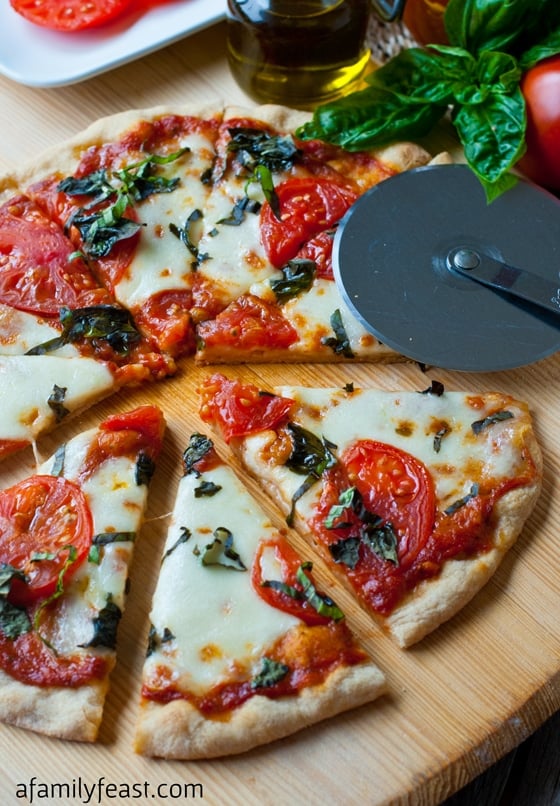
- Dust the pizza peel with regular corn meal. This will allow the finished pizza to slide off onto the stone. Gently lift the dough circle onto the peel and top with your favorite sauce, cheese and pizza toppings. For our demonstration, we used our own home made pizza sauce (see recipe here), fresh mozzarella and handpicked fresh basil but you can top with your favorite combinations.
- Open the oven door and quickly slide the pizza onto the stone with a jerking motion. Do a little at a time and once the corner catches, the peel should slide right out. Close the oven door quickly and if cooking at 550 degrees, the pizza should be done in about seven minutes. Adjust as needed depending on your oven’s highest temperature.
- Use a pair of tongs, and slide the cooked pizza onto a pan and then onto a cutting board where you will cut into wedges and serve.
- If you are pulling dough from the freezer, they still will need to sit overnight in the refrigerator to get the gluten working. Then follow the remaining steps above.
Last Step! Please leave a review and rating letting us know how you liked this recipe! This helps our business thrive & continue providing free recipes.
You may also like:
Pizza Margherita with Roasted Tomato Pizza Sauce
Prosciutto and Fig Pizza with Arugula


I think you pizza dough is fantastic. I have made it once and am in the process of making it as I type.
My question is: Can I make it on Thursday( today ) and refrigerate it until Saturday or Sunday?
Thank you, Brian
Hi Brian – My apologies for the delay in responding. Assuming you went ahead and made the dough yesterday and it’s in the refrigerator now, we’d suggest freezing it (see Step 8) until you want to use it on Saturday or Sunday – the continue with Step 9. Even refrigerated, the dough will still begin to rise slowly. So to ensure the best results, freezing it is your best bet. As reassurance, we’ve frozen and thawed the dough ourselves many times and it bakes up nicely. Hope that helps – we’re so glad you enjoy this recipe as much as we do!
I made this pizza dough last night and my family and friends loved it! Thanks for such a great recipe. We will definitely make Again!!
Thank you!
Whats the longest the dough can sit in the fridge before you would want to freeze it? Thanks!
Hi, this is Jack.
Great question, you can keep the dough refrigerated for up to three days.
we never get enough of your wonderful stuff….stuff….stuff ..
your recipes work well for us…..a big thanks. richard
Thanks so much Richard! We’re so glad you are enjoying our recipes! Thanks – as always – for taking the time to write to us today! Have a nice evening! Martha
Made this recipe a couple weeks ago, it was AMAZING. I froze the rest of the pizza dough. I want this dough to turn out just as good. When should I remove it from the freezer? Two days before; one day to let it thaw in the fridge and one to let it sit overnight as it would have from a fresh state? Thanks! All of your recipes are wonderful.
Thanks Sarah! So – it will depend on when in the process you froze the dough. If the dough already sat overnight in the refrigerator before you froze it, then you can just pull it out in the morning to thaw and use it the same day once it thaws. But if the frozen dough hasn’t yet gone through the fermenting process (overnight in the refrigerator) then pull the frozen dough out the night before and have it sit in the refrigerator overnight, then two hours before take it out of the refrigerator. I hope that helps!
I do not have a mixer, can this be done by hand? I have been looking for a great Pizza dough recipe.
Hi Kim – Yes – but it will likely take a while by hand!
Hi there,
if you don’t have a stand mixer, how do the directions change? I’d be just using my hands and/or food process or hand mixer.
thanks!
Hi Joanne – you can hand knead the dough although it might take quite a bit of effort to get it to the texture you need! Hope that helps!
Dear Martha and Jack,
We LOVED sampling this with you — it was deliciously chewy yet crusty, just like you said in the post — and we appreciate the clear directions for making it!
David and Sandi
Thanks Sandi and David! We’re glad we had your help!! See you soon!