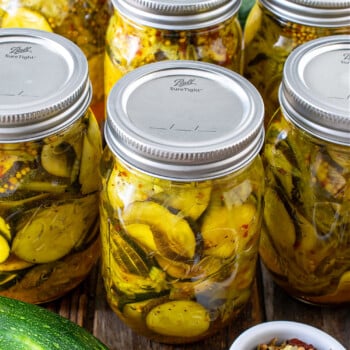
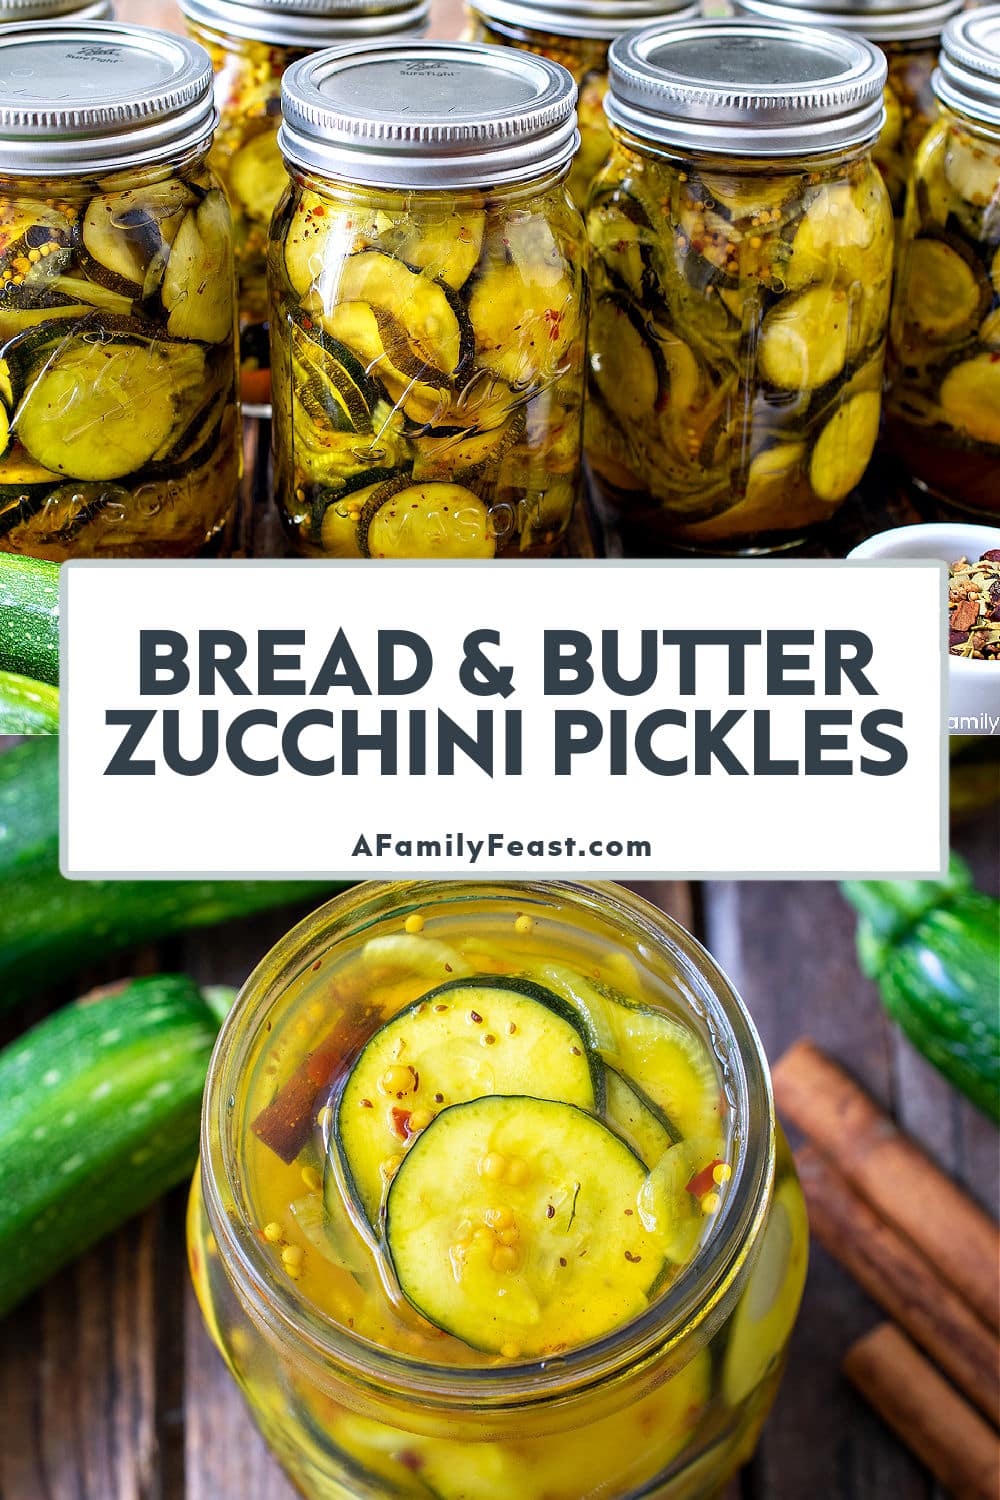
Bread & Butter Zucchini Pickles are sweet, tangy, sour, spicy – and very delicious. You’d never guess these pickles were made with zucchini slices!
A delicious way to preserve garden grown zucchini
We’ve officially reached the “Say Uncle” stage of our backyard garden zucchini! The hot, dry weather we’ve had this summer has given us a bumper crop – and we’ve been picking more zucchini than we could possibly eat ourselves or give away to friends.
These Bread & Butter Zucchini Pickles are one of our favorite ways to preserve fresh zucchini so we can enjoy it long after summer’s growing season. After one taste, you’d really be hard pressed to tell that these sweet and tangy pickles are made with zucchini instead of cucumbers.
Like any other bread & butter pickle, these zucchini pickle chips are great on sandwiches and burgers. Mix them into a dip or pasta salad, or eat them by the forkful – they are that good – or you can even make fried pickles!
You can make these as refrigerator pickles (they will last up to three months in the refrigerator), or can them for longer-term storage (up to a year).
Why are they called Bread & Butter Pickles?
Some believe that the name dates back to the early 1900’s, when people added pickles to bread and butter sandwiches. It was a low cost, readily available meal when food supplies were low.
There have also been several bread and butter pickle trademarks over the last hundred years or so, with the earliest dating back to 1923 and belonging to Omar and Cora Fanning of Illinois. Cora was known locally for making sweet and sour pickles using a recipe from Omar’s grandmother, and when money was tight, she bartered her pickles for groceries – including bread and butter.
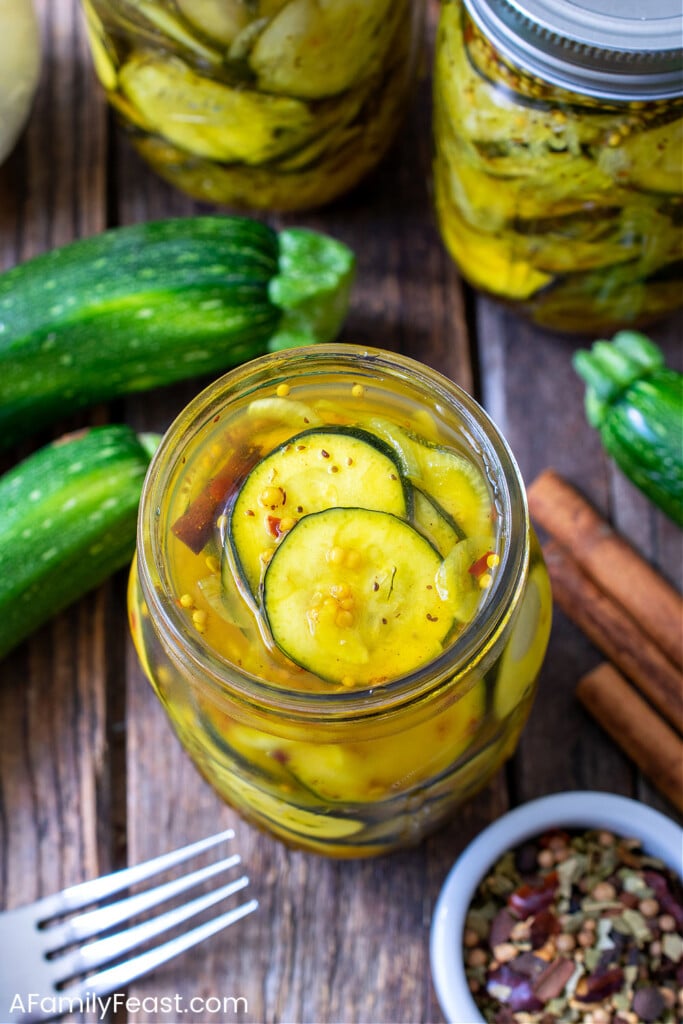
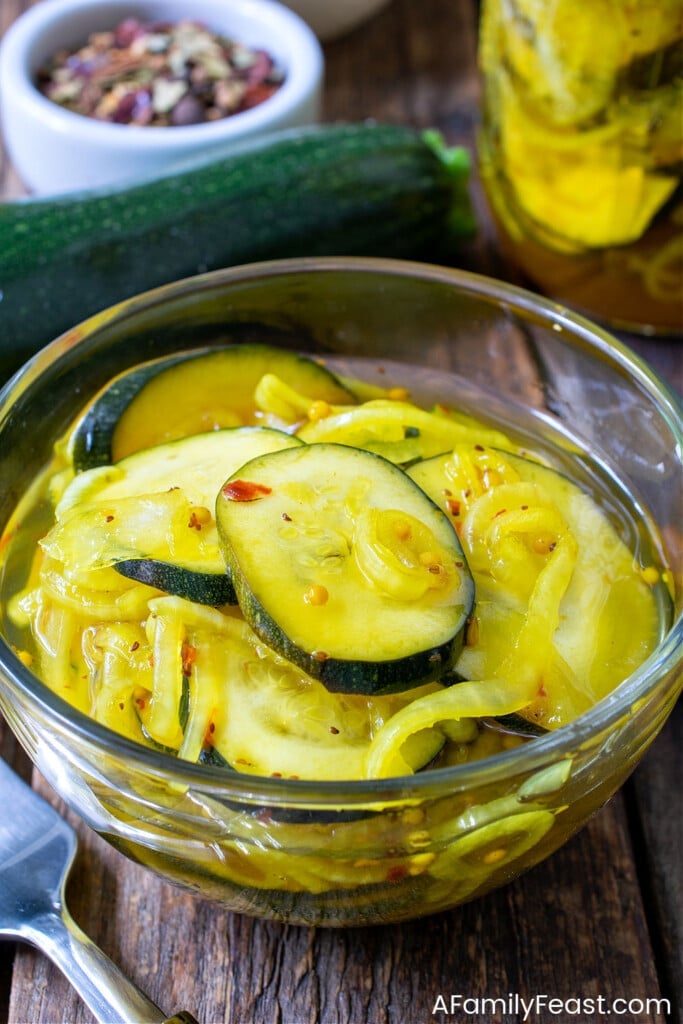
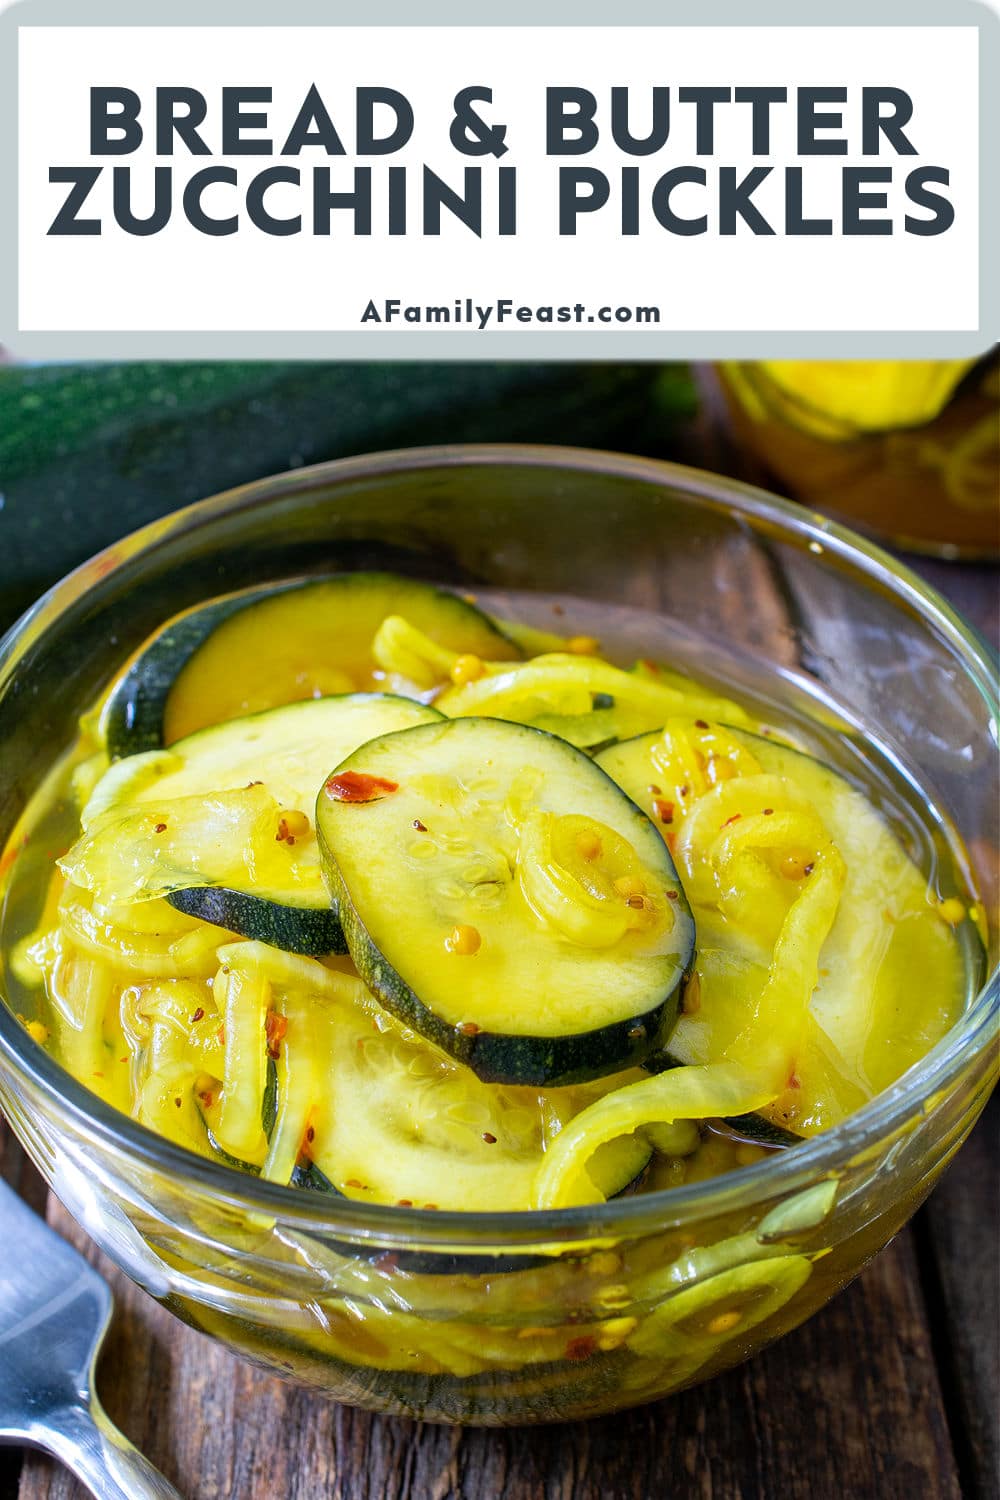
Today, bread and butter pickles are known for being sweet and tangy, with spices and a great crunch. Surprisingly, the pickled zucchini in our recipe today retains the same crunch as a cucumber!
Why you'll love Bread & Butter Zucchini Pickles
- They taste just like the pickles made with cucumbers.
- It’s another great way to cook with zucchini from your backyard garden.
- When canned, you can enjoy fresh summer zucchini all year long.
Tips & Tricks
Use the freshest zucchini you can find to make these zucchini pickles. Fresh zucchini will ensure a crispy pickle texture.
Key Ingredients & Substitutions
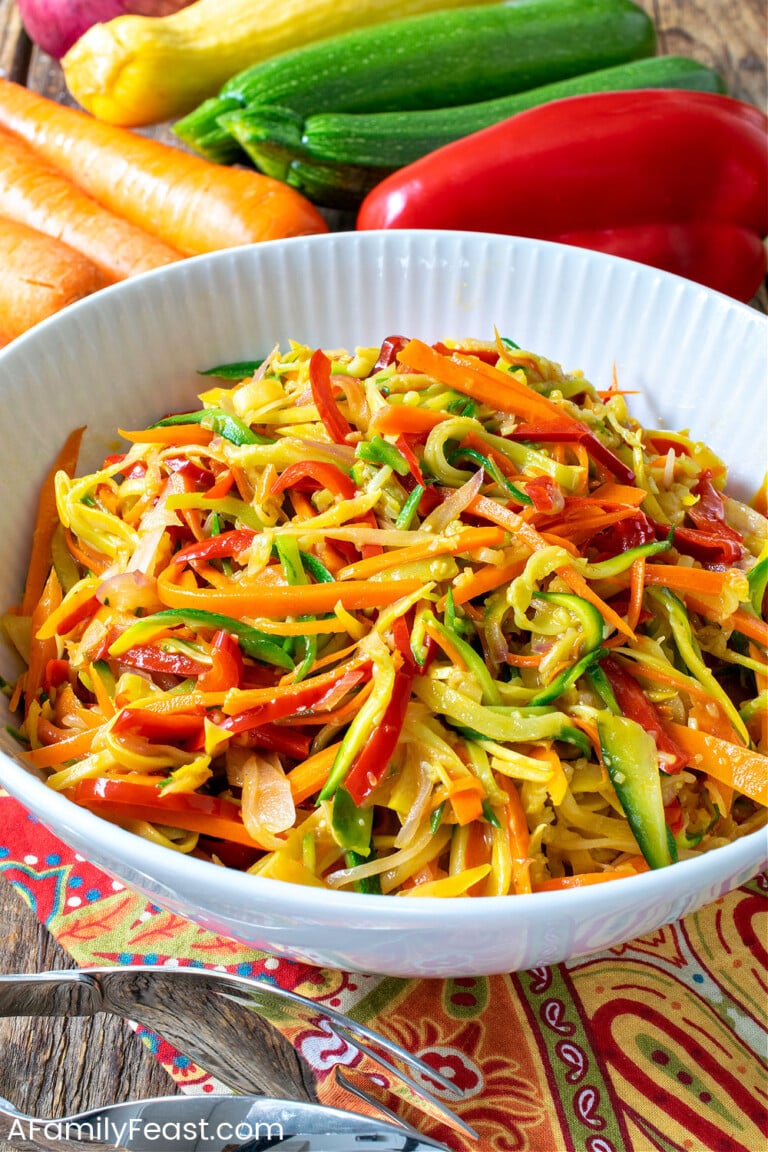
- Zucchini – Choose zucchini on the smaller side for this recipe, so your pickle chips are small and will easily fit in the jar.
- White onion – While a yellow or a sweet onion can be used in this pickle recipe, the stronger, sharper-tasting white onion perfectly offsets the sweetness of the pickle brine.
- Pickling Salt – This is used to draw out any bitterness from the squash, and also pulls moisture out, making the pickles crisp. Kosher salt can be used as long as it does not contain any additives or agents that prevent the salt from caking or clumping together.
- Vinegar – You’ll use both white vinegar and apple cider vinegar to make the pickling brine. Check the label to make sure that both vinegars are 5% acidity.
- Granulated Sugar – Also used in the brine.
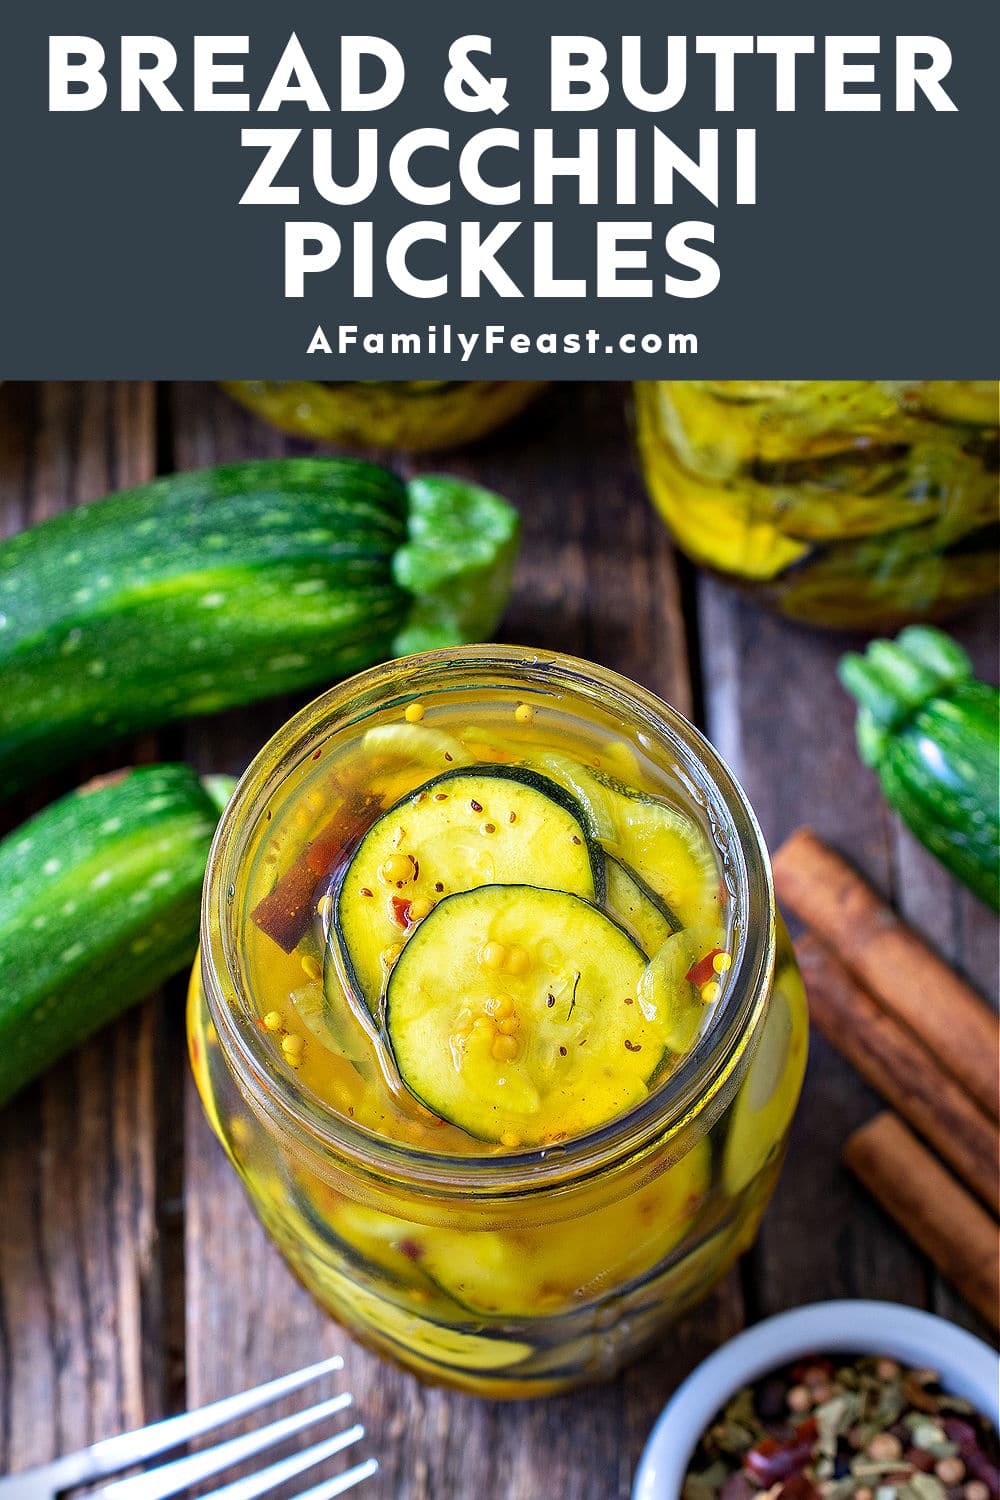
- Pickling Spice – You can use a packaged pickling spice for convenience. But we like to make our own using mustard seeds, crushed red pepper flakes, celery seed, cinnamon sticks, allspice berries, whole cloves, and ground turmeric.
Special Tools Needed
- Cutting board and sharp knife
- Mandolin (a hand-held slicer like this will make slicing the zucchini and onions very easy) OR use a knife OR a food processor with slicing blade.
- Extra-large bowl
- Tea Towel/Flour Sack Towel (must be lint-free)
- Paper towels – To dry the soaked zucchini chips
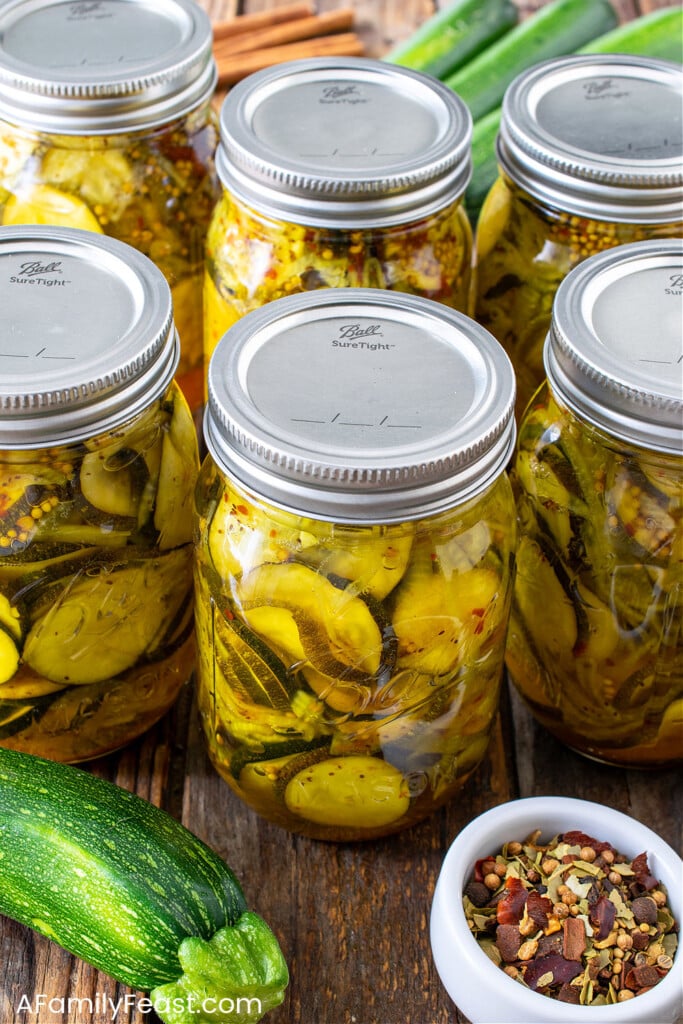
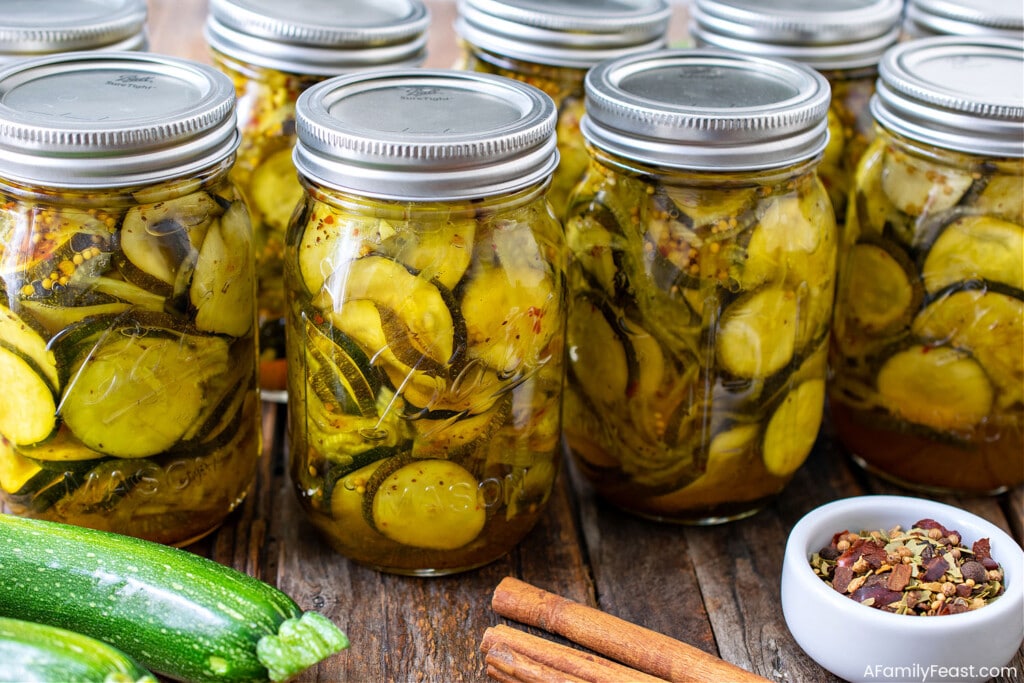
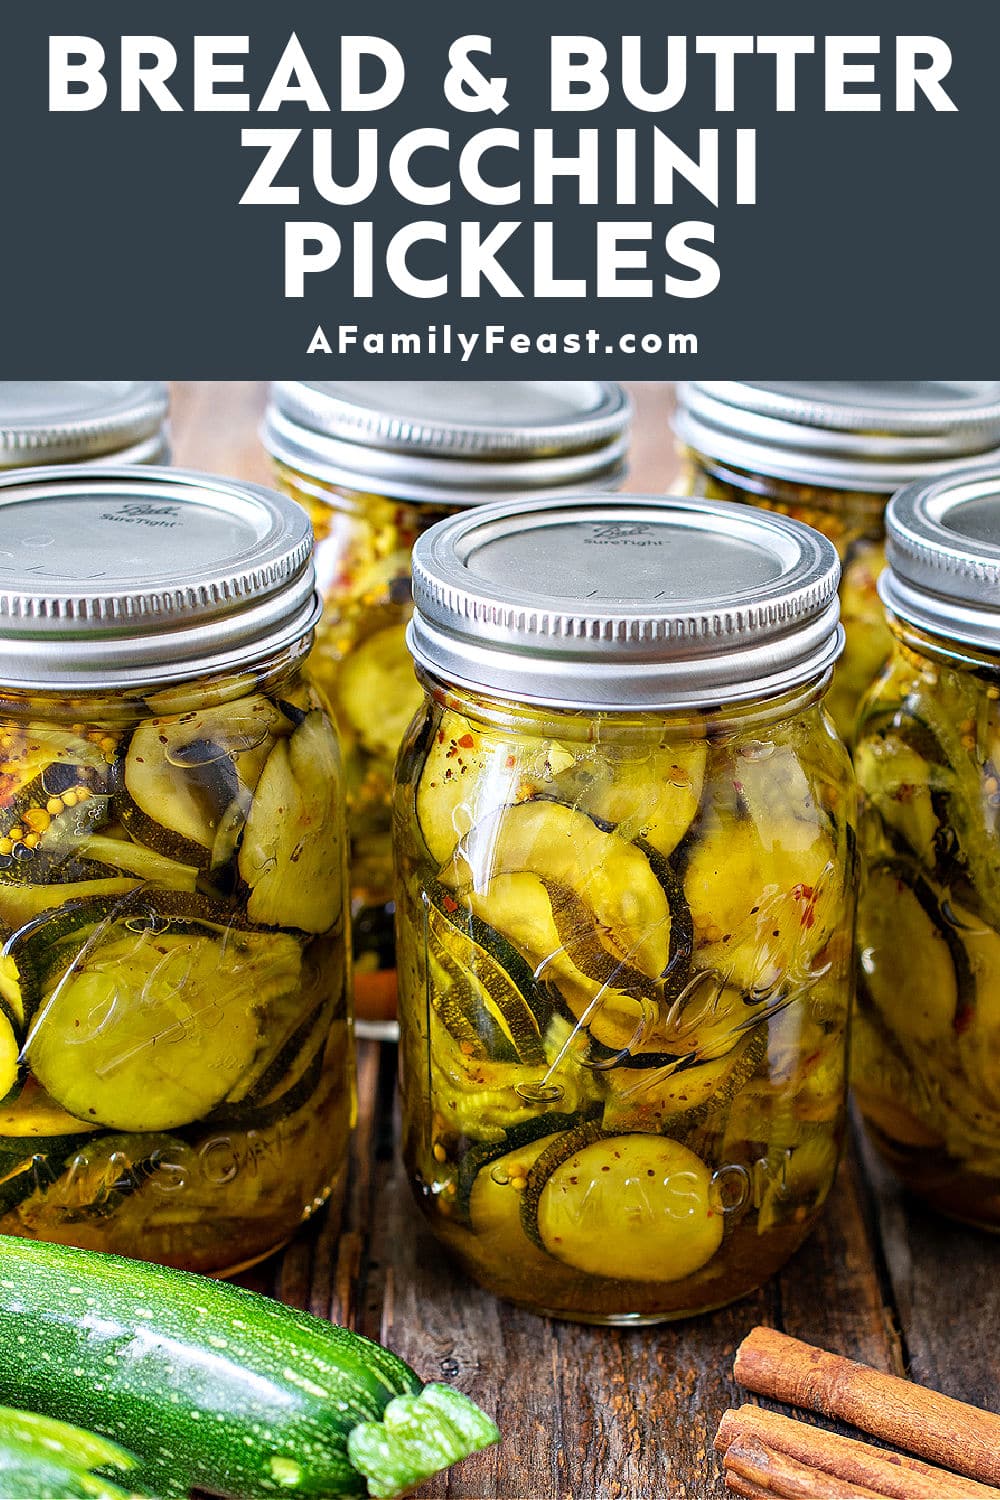
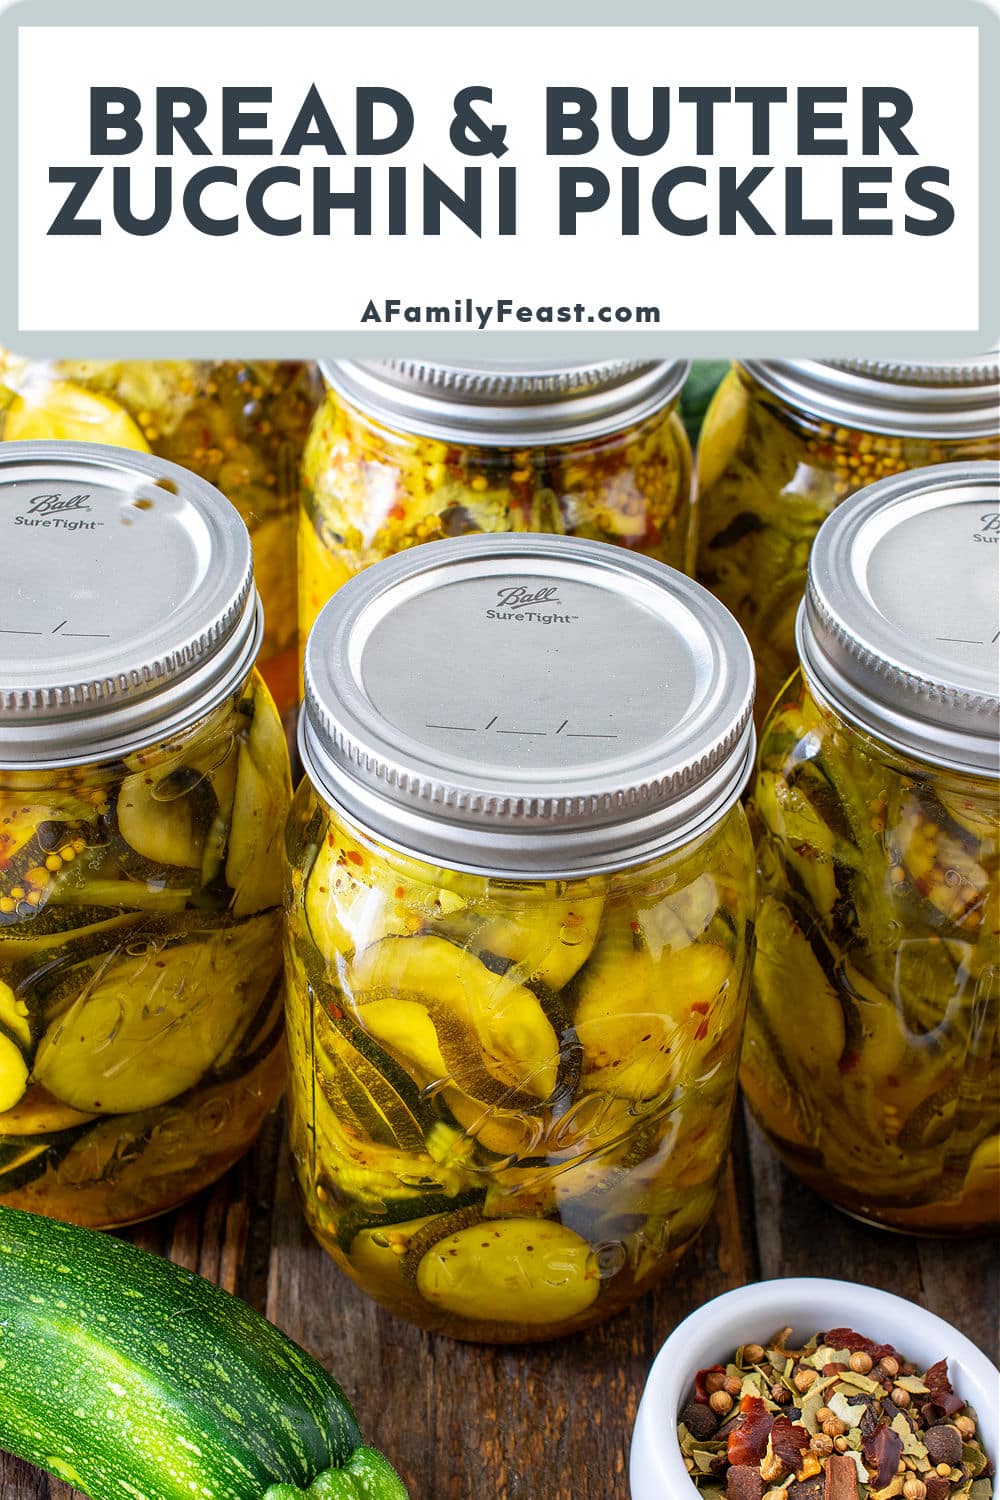
- Canning Jars – You’ll need 10 one-pint (2 cup) wide-mouth mason jars with lids and rings
- Ladle
- If Canning: A large, tall pot to boil the water for canning, a canning funnel, canning jar grippers and long handled tongs, silicone or metal rack to put in the bottom of the pot. (See Product Recommendation below.)
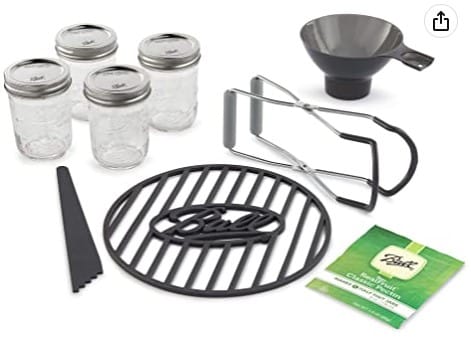
Product Recommendation!
How do I make Bread & Butter Zucchini Pickles?
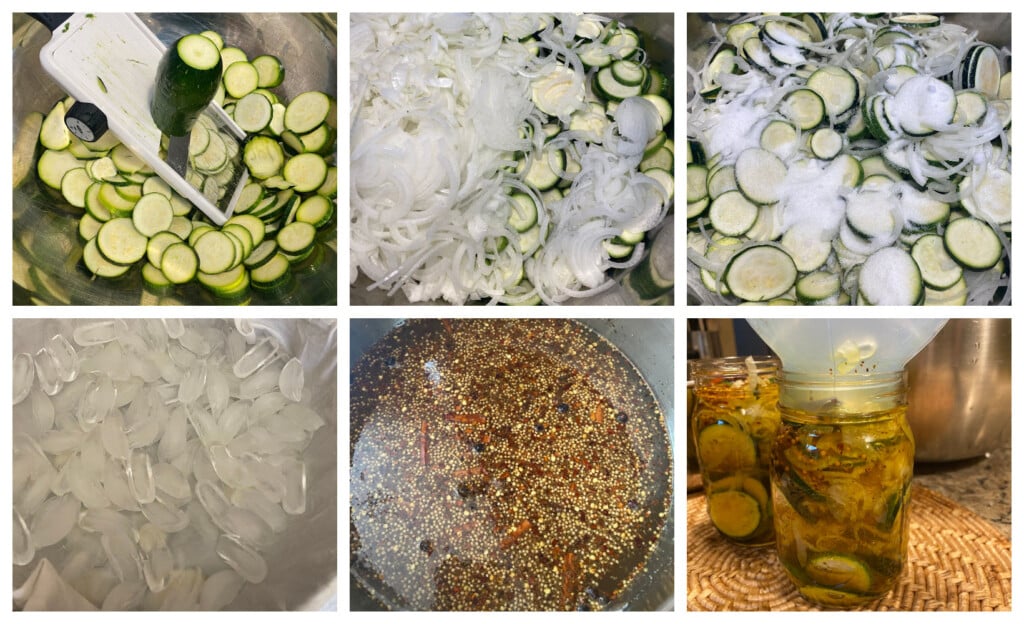
- Rinse the zucchini, wiping the sides to clean the skins.
- Trim both ends from the squash.
- Slice into thin quarter-inch slices, then place in a very large bowl.
- Slice the onions thinly, then add them to the bowl with the zucchini.
- Sprinkle on the pickling salt and toss to coat. Cover with a thin tea towel then cover the top of the tea towel with ice cubes. Refrigerate for four hours.
- After four hours, discard ice and rinse the zucchini and onion slices. Drain well, then lay out on paper towels to dry.
- Sterilize jars in hot boiling water. Wash the lids and rims in hot soapy water, then rinse. Keep the jars in the hot water with burner on low until ready to fill.
- Make the brine by combining all of the brine ingredients with the spices and bring to a boil. Simmer five minutes, then lower burner to low and keep hot.
- Using long handled tongs, carefully remove one jar at a time from the water and fill with the zucchini and onion slices to about an inch from the top. Ladle in the hot brine to a half inch from the top and wipe the rim. Place on lid and hand tighten jar cover. Repeat for all jars.
- If not canning, place the jars of pickles in the refrigerator and enjoy for up to three months. (The pickles will be ready to eat after about a week.)
- If canning, place the jars back into the pot of hot water. You may need to remove some water to accommodate any water displacement.
- Bring pot to a boil and boil for 15 minutes covered slightly. Turn off burner and let sit for five more minutes, then remove jars to a rack to cool.
- Let jars sit at room temperature until lids pop and create a tight seal. Store for up to one year. Refrigerate once opened.
Tips & Tricks
Before storing your jars of Bread & Butter Zucchini Pickles, allow the jars to cool overnight. Test the seal to make sure it is secure before moving the jars to the pantry. You know you have a good seal if you push down on the top and it does not push back.
If you have any movement or hear a popping sound, the canning seal may not be tight enough to preserve your pickles. You’ll have to repeat the canning process, or store in the refrigerator.
Frequently Asked Questions
- Can I make Bread and Butter Zucchini Pickles ahead of time? Yes, these pickles have the best flavor after sitting for a week or longer.
- Can I halve this recipe? Yes – just use half the amount of each ingredient.
- How do I store leftovers? Once a jar of pickles is opened, keep refrigerated for up to three months.
You might like these other Canning Recipes:

Click here for more delicious Zucchini Recipes!
Bread & Butter Zucchini Pickles
Bread & Butter Zucchini Pickles are sweet, tangy, sour, spicy – and very delicious. You’d never guess these pickles were made with zucchini slices!
- Prep Time: 5 hours
- Cook Time: 20 minutes
- Total Time: 5 hours 20 minutes
- Yield: 9 pints 1x
- Category: condiment
- Method: canned
- Cuisine: American
Ingredients
5 pounds small to medium zucchini squash
1 large white onion
1/2 cup pickling salt (This is salt without a noncaking agent)
Brine
2 1/2 cups white distilled vinegar (5% acidity)
2 1/2 cups cider vinegar (5% acidity)
5 cups granulated sugar
Spice mix*
2 tablespoons mustard seeds
2 teaspoons crushed red pepper flakes
2 teaspoons celery seeds
1 cinnamon stick broken into pieces
12 allspice berries plus 1/4 teaspoon ground allspice
12 whole cloves plus 1/4 teaspoon ground cloves
1 teaspoon ground turmeric
Instructions
- Rinse the zucchini, wiping the sides to clean the skins.
- Trim both ends from the squash.
- Slice into thin quarter-inch slices using a mandolin or if you have a special blade on your food processor and place in a very large bowl.
- Slice the onions thinly and add to the bowl with the zucchini.
- Sprinkle on the pickling salt and toss. Cover with a thin tea towel then cover the top of the tea towel with ice cubes. Place in the refrigerator for four hours.
- After four hours, discard ice and rinse the squash and onion slices then drain. Lay out the sliced vegetables over paper towels then more paper towels on top and dry.
- Boil a large pot of water or a canning pot and place the jars into the hot water to sanitize. Wash the lids and rims separately in hot soapy water then rinse. Keep the jars in the hot water with burner on low until ready to fill.
- Make the brine by combining all of the brine ingredients with the spices and bring to a boil. Simmer five minutes then lower burner to low and keep hot.
- Using long handled tongs, carefully remove one jar at a time and fill with the zucchini and onion slices to about an inch from the top. Ladle in the hot brine to a half inch from the top and wipe the rim. (Using a jar funnel designed for canning makes this job easier). Place on lid and hand tighten jar cover. Repeat for all jars.
- If not canning, place these in the refrigerator and keep using for three months.
- If canning, place the jars back into the canning pot. You may need to remove some water to accommodate water displacement. You’ll want the water in the pot to be about an inch higher than the tallest jar.
- Bring to a boil and boil for 15 minutes with the cover of the post slightly ajar. Turn off burner and let sit for five more minutes then remove using a canning jar gripper. Let sit at room temperature until lids pop and create a tight seal. We let ours sit overnight before testing. You know you have a good seal if you push down on the top and it does not push back. Store for up to one year. Refrigerate once opened.
Notes
*You can substitute all of the pickling spices for a jarred pickling spice mix however the flavor of the brine will be different than our recipe. If using the jarred spice mix instead of our mixture, use ¼ cup (4 tablespoons).

I just love zucchini and it is a yummy idea to “cook” them. Miammmm, as we say in France.
Thank you! 🙂
Excellent easy to follow worked perfect will use continuously
Thanks Judie!