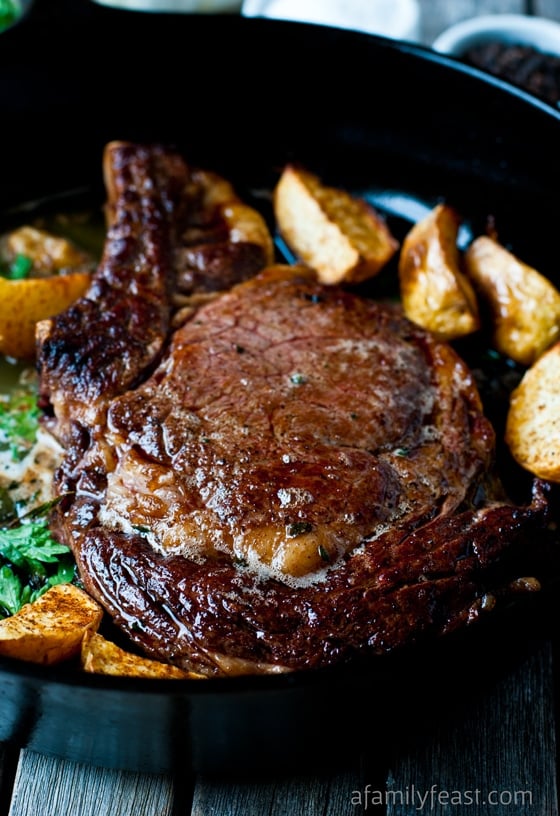
Today we’re going to share a technique for cooking a tender Top of the Round Roast!
The top of the round is cut from the hind quarter of a steer, and it’s a very affordable cut of beef to buy at your local grocery store. Because it’s essentially muscle meat, a top round roast is lean and very flavorful, but it lacks fat and marbleizing throughout – so it can be tougher, and not as juicy as roasts made from more expensive cuts of beef.
Top of the round roasts are often cooked at home as pot roasts where they get tender during a braising process. (Top of the round roasts are also the cut of beef that is typically sold as pre-cooked roast beef at your supermarket deli counter!)
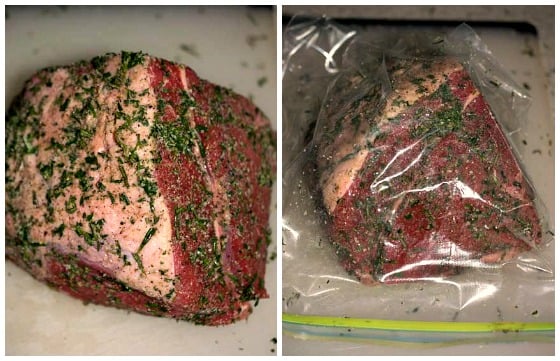
But today, we’re sharing an alternative method – called the pre-salt method – that also makes this kind of roast more tender after cooking. Pre-salting involves coating the beef in salt, herbs and spices (almost like a dry rub) and then placing the beef in a sealed plastic food bag for 24 hours before cooking.
Pre-salting 24 full hours in advance does two things: It breaks the sinew of the meat down a little. And – it adds flavor to the inside of the meat.
The magic in this technique is achieved with the salt. The salt draws the liquid from the roast, grabs the flavors you have added (herbs and other seasonings) and then sends all of that flavor back into the meat. As it sits for the full 24 hours in the plastic food bag, you can watch the juices come out – but when you look at the top round roast after the 24 hours – there will be little, if any, liquid left in the bag. That is because the juices all went back into the meat.
This pre-salt method can actually be used on any meat, but not on fish. There is a slightly different method (we do not cover that in today’s post) that is used for a steak where less time is needed, but the general idea is the same.
If you decide to follow our recipe, please note that we don’t want to mislead you into thinking that your top round roast will be as tender and juicy as a more expensive rib eye roast – it simply won’t be the same as that! But for an inexpensive cut of beef like Top of the Round, this method works pretty well to make it tender for eating.
Also – below our recipe, we’ve shared some suggestions on cutting and slicing this roast. Be sure to read that as well!
PrintTop of the Round Roast
Please note: This recipe gives you proportions of salt, herbs and spices to use based on each pound of beef. Depending on the size of roast you purchase, calculate the exact amounts needed using our recipe below.
- Prep Time: 24 hours
- Cook Time: 2 hours
- Total Time: 26 hours
- Yield: 6–8 servings 1x
Ingredients
- 1 Top of the Round roast, about 3-4 pounds
- 3/4 teaspoon of kosher salt per pound of beef
- 1/4 teaspoon of freshly ground pepper per pound of beef
- 1/4 teaspoon garlic powder per pound of beef
- 1 teaspoon of fresh herbs per pound of beef (any combination of fresh thyme, parsley and rosemary)
- 2 tablespoons olive oil
Instructions
- Mix herbs and spices and coat beef. Place beef in gallon zipper seal bag 24 hours prior to cooking. (So if you want it for dinner tomorrow at 6:00 PM, it needs to go into the bag today at 2:00 PM to allow for 2 hours to come to room temperature and 2 hours cooking time.) If you remove it sooner than 24 hours, some of the liquid that the beef gives up in this process will not have worked its way back into the meat and it will roast up dry.
- Refrigerate and after 24 hours, and two hours before serving preheat your oven to 325 degrees.
- Four hours before serving, remove the beef from the bag and pat dry with paper towels. The only liquid should be just a little surface moisture.
- Let roast come up to room temperature, about 1-2 hours.
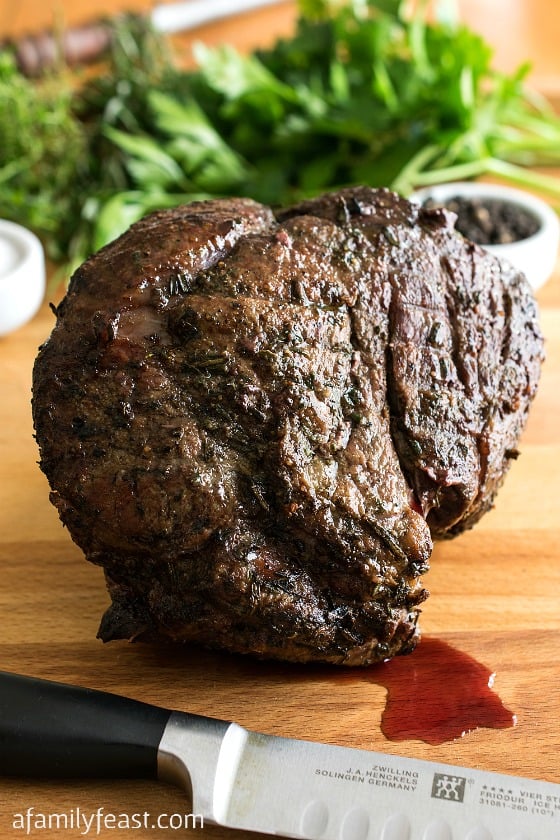
- Heat a cast iron skillet to smoking hot and add olive oil. When the oil is shimmering and hot, add beef and sear on all sides, top and bottom for about 2 minutes on each side. Have a sheet pan or roasting pan ready with an oven proof rack in it.
- Once the meat is completely seared, place on rack in pan, if using, insert remote meat thermometer
into the thickest part of the roast and place in oven. (Our roast was 3.3 pounds and took exactly 95 minutes to get to 135 degrees for medium rare.) After it is removed from oven and sits, it will cook to 145 degrees so removing at 135 is the perfect temperature. If you are not using a remote thermometer, test for doneness with probe thermometer at the 90 minute mark.
- The bits left in the cast iron skillet should be discarded. The searing process sears the meat but burns the herbs so what is left in the skillet after searing is not usable for gravy. However what drips onto the bottom of the sheet pan or roasting pan after it comes out of the oven is usable. See below for a simple gravy.
- After the roast comes out, leave thermometer inserted and tent the roast with foil. Let rest for 15 minutes. Make gravy (if desired) while the meat rests.
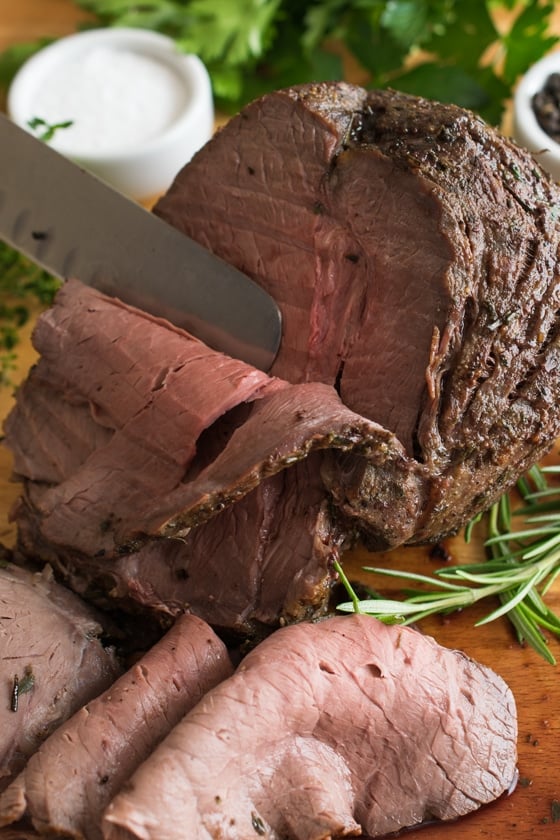
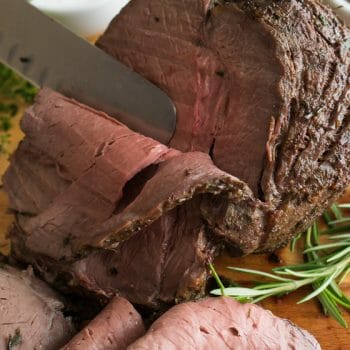
- After it rests, slice on an angle against the grain and serve. Some more liquid will drip as you slice. Add that liquid to your homemade gravy (see notes below for gravy guidelines.)
Notes
Some more notes from Jack on Top of the Round cuts:
Usually the roast is cut with two sections of beef connected by connecting tissue – a large cut and a smaller piece. The smaller piece has grain that runs in the opposite direction of the larger piece so when I carve a roast like this, I run a boning knife between the two pieces after the roast comes out of the oven and rests, and I completely separate them. Then I turn and carve each piece against the grain.
If you really want to take this to the next level and have the entire roast cook at the same doneness, you could separate these two pieces prior to roasting and pull the smaller piece out of the oven before the larger one. I have done this before if I know everyone likes the same doneness, however leaving them connected gives you medium rare from the larger piece and medium from the smaller piece for those who don’t like it too rare.
Gravy Guidelines:
For every four ounces of fat, add four ounces of flour and that will thicken one quart of liquid. This will work for any sauce using chicken stock, beef stock or milk. Reduce or add proportionally to your needs.
To make a simple gravy, in a two quart sauce pan, melt four ounces of butter and add four ounces of flour and cook over medium low heat for about five minutes until the raw flour smell is gone. Stir this often with a wooden spoon while it cooks. This is called a roux and should smell like cooked chestnuts when done. The longer you cook the roux, the darker the sauce will be. For a white sauce, cook it three minutes, for a darker gravy like for this beef, cook five minutes.
Pour off any juices from the sheet pan into another two quart sauce pan and add water or canned stock to equal one quart total liquid (half the two quart pan). Heat stock to almost boiling.
One third at a time, add hot stock to hot roux, whipping after each addition with a wire whisk. The first one will make a thick paste, the second will thin it out a bit and the third will be perfect pan gravy. Both the roux and the liquid need to be hot to avoid lumping. Adding it one third at a time will also eliminate lumping.
Season the gravy to your taste with salt, pepper or chopped parsley. If using canned stock added to pan drippings, you may want to taste first before adding salt. Let the sauce stay on low while you slice the meat. Then serve both to your guests or family.
You may also like:
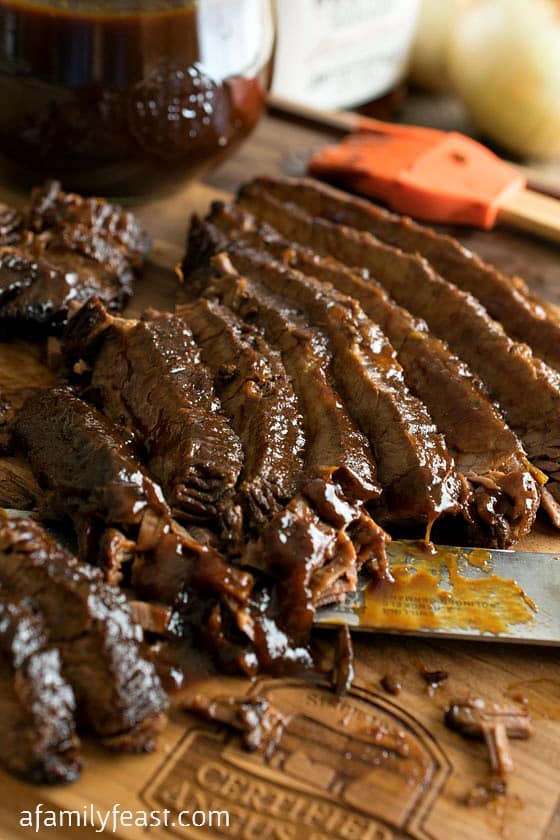
Slow Cooker Barbecue Beef Brisket
OMG we could not stop eating this!
I had bought a top round roast on sale but I had no idea how to cook it. I found your recipe on Pinterest. I had never used this salted method before but I decided to try it. My husband helped out and salted the meat, wrapped it up and put it in the refrigerator. I didn’t notice until the morning that he never put the other seasoning on it. So, I unwrapped it, added the other seasonings( all dry because I didn’t have any fresh on hand) and wrapped it back up. My roast was just under 3 lbs. and I cooked it just under 1 1/2 hrs. However, some of my family likes it done a little more, so it wound up perfect for everyone. I was still snacking on it as I was pack up the leftovers.
Thank you for a great recipe and very clear instructions. I was nervous having never made this before but it was awesome!
Can I use this method for other cuts of roasts? Eye of round roast? Bottom round roast?
Thanks
Hi, this is Jack. You can use this method on any cut of beef that usually cooks up tough. Eye, bottom and top round roasts are perfect for this.
Good luck.
This is one of the best recipes I have ever made. Thank you so much for the clear detailed instructions. Turned out PERFECT! Now I want to check out the other recipes on the site 🙂
Thanks Jeremy! So glad you enjoyed the recipe!
Generally when cooking any beef i always let it sit to room temperature so the meat does not tighten. I have made many roasts and wanted to give this one a try. You don’t say in the instructions about if you take the beef straight from fridge to oven. Do you also let this sit to room temp before cooking.
Fantastic question. I’m mad at myself for not thinking of this. You are 100% correct and I am going in and editing the recipe to include this step. Yes, let the roast come to room temperature, about 1-2 hours depending on the size. Great catch.
I have been cooking for 40+ years and this is the first time I cooked a Top of the Round Roast outside of a crockpot. My roast was 2.89 pounds and I followed the recipe exactly. I checked it after 90 minutes as suggested with my Thermapen, and at the thickest part of the roast it was shockingly at 154 degrees and 172 at the thin end. I immediately pulled it from the oven, let it rest for 10 minutes, and as I expected, it was sadly well done. It was salvaged by dousing it in lots of gravy. It was flavorful thanks to the 24 hour marinading – which I recommend. I will try again and make sure to check it after 60 minutes because I like my roast medium rare. I also know that my oven is properly calibrated and that it was cooking no higher than 325. I am sure this will be fantastic if cooked to medium rare. If at first you don’t succeed, try try again!
Thanks for sharing your experience Vera! I’m sorry our general timing didn’t match up with yours – sometimes we are surprised ourselves when things cook faster than anticipated. We do recommend using a probe thermometer that stays inserted in the roast as it bakes (vs instant read thermometers like the Thermapen, although Thermapens are awesome tools too!) – the probe thermometer will alarm once the inside reaches the desired temperature, which can help prevent over baking when something cooks faster than expected. I hope you’ll give the recipe another try!
If you roasted the beef in the oven bag after the presalt, would it be even tastier?
Hi Mary – Would you believe that neither Jack nor I have ever used oven bags for roasting? So we can’t say for sure…but we think it would work from what we’ve read about the bags. Please let us know how it works out if you try it!
Flavour of roast was delicious and tender, but a bit dry, even when cooked in an oven bag to medium. I served with the juices that collected in the bag during roasting. The roast was topside cut, small and very lean – just over a kilogram (2.4 lb) and this may be why it was not as moist as I would have liked. Definitely will make this again.
Thanks for letting us know that the oven bag works Mary! (Yes – this is a very lean cut of beef!)
Tried this recipe today for New Year’s Day dinner. I don’t often cook roasts – my husband is Italian as are most of my recipes lol. But our son doesn’t tolerate the red sauce well, and as an Irish girl – I love a good roast beef with mashed potatoes and gravy so thought I’d try this. It was very tasty, could have cooked it a little bit longer (maybe 10 minutes or so) and my husband thought it was very salty. But I see in other comments the I should have used Kosher salt – I believe this would have toned down the salt taste – correct? I’ll def be having this again – alternating with my Sunday sauce, meatballs and sausage; lasagna; eggplant; etc. 🙂 Thanks for the recipe!
Ah, good one. Yes, Kosher salt. I will go in and correct the recipe now.
How long would you suggest for a 5 1/2lb roast?
Hi Patti
It depends on the shape. If a 3 pound roast and a 5 pound roast are 6″ thick at the thickest part, they will take the same amount of time. However if the 5 pound roast is thicker than a 3 pound roast, it will take longer because the heat needs more time to penetrate to that thickets part. Always cook to the correct internal temperature by inserting a probe into the thickest part. In your case, I’m guessing that your roast is probably thicker than the one we roasted in the recipe so I would guess that it would take an extra 30-40 minutes. Again since I can’t see exactly how thick your roast is compared to ours, i’m taking a guess but it’s probably pretty close.
Good luck
Jack
It was delicious! We raise our own meat, so this grass fed round roast along with your recipe and cooking tips was spot on! Thank you!
Can you keep roast in the marinate bag for longer than 24 hours. Up to two days? Just wondering
I wouldn’t. I tried this once and it just didn’t roast right. I’m not sure what chemical reaction goes on but leaving it in longer just makes the meat funky. I looked through a few cook books and they all say “up to 24 hours” but don’t really say why. So simple answer is no, I wouldn’t let it go for more than 24 hours.
Good Luck!
Jack
My husband and I are cooking 80 pounds of bottom round cut in 10 pound pieces. Any suggestions?
Hi Joanne – I just shared your question with Jack. He said that the process would be exactly the same and you’ll want the same internal temperature at the end of the roasting. However, the cooking time will be longer for such a large roast and if you are cooking more than one roast in the oven – just plan accordingly. Good luck!
I have not tried this yet. It looks luscious!!! My question is: can it be cooked in a slow cooker instead of the oven after searing?
Hi Sandra – Slow cooking is totally different…you won’t see the same results or texture of the meat. Sorry!
Sandra….im thinking of doing this in my Weber kettle grill. I can hold the 325 F pretty steady for the required time. Do you see and issues with this cooking method??
If you can hold an even temperature Cecil – it might work! Please let us know how it comes out!