Today we’re going to share a technique for cooking a tender Top of the Round Roast!
The top of the round is cut from the hind quarter of a steer, and it’s a very affordable cut of beef to buy at your local grocery store. Because it’s essentially muscle meat, a top round roast is lean and very flavorful, but it lacks fat and marbleizing throughout – so it can be tougher, and not as juicy as roasts made from more expensive cuts of beef.
Top of the round roasts are often cooked at home as pot roasts where they get tender during a braising process. (Top of the round roasts are also the cut of beef that is typically sold as pre-cooked roast beef at your supermarket deli counter!)
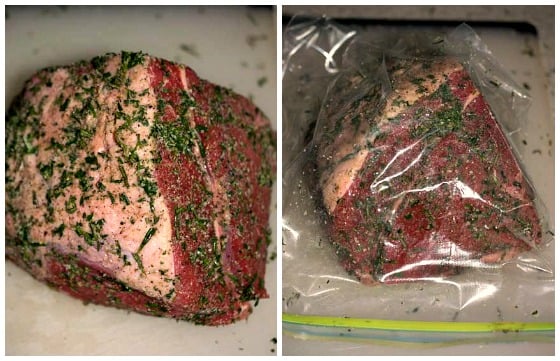
But today, we’re sharing an alternative method – called the pre-salt method – that also makes this kind of roast more tender after cooking. Pre-salting involves coating the beef in salt, herbs and spices (almost like a dry rub) and then placing the beef in a sealed plastic food bag for 24 hours before cooking.
Pre-salting 24 full hours in advance does two things: It breaks the sinew of the meat down a little. And – it adds flavor to the inside of the meat.
The magic in this technique is achieved with the salt. The salt draws the liquid from the roast, grabs the flavors you have added (herbs and other seasonings) and then sends all of that flavor back into the meat. As it sits for the full 24 hours in the plastic food bag, you can watch the juices come out – but when you look at the top round roast after the 24 hours – there will be little, if any, liquid left in the bag. That is because the juices all went back into the meat.
This pre-salt method can actually be used on any meat, but not on fish. There is a slightly different method (we do not cover that in today’s post) that is used for a steak where less time is needed, but the general idea is the same.
If you decide to follow our recipe, please note that we don’t want to mislead you into thinking that your top round roast will be as tender and juicy as a more expensive rib eye roast – it simply won’t be the same as that! But for an inexpensive cut of beef like Top of the Round, this method works pretty well to make it tender for eating.
Also – below our recipe, we’ve shared some suggestions on cutting and slicing this roast. Be sure to read that as well!
PrintTop of the Round Roast
Please note: This recipe gives you proportions of salt, herbs and spices to use based on each pound of beef. Depending on the size of roast you purchase, calculate the exact amounts needed using our recipe below.
- Prep Time: 24 hours
- Cook Time: 2 hours
- Total Time: 26 hours
- Yield: 6–8 servings 1x
Ingredients
- 1 Top of the Round roast, about 3-4 pounds
- 3/4 teaspoon of kosher salt per pound of beef
- 1/4 teaspoon of freshly ground pepper per pound of beef
- 1/4 teaspoon garlic powder per pound of beef
- 1 teaspoon of fresh herbs per pound of beef (any combination of fresh thyme, parsley and rosemary)
- 2 tablespoons olive oil
Instructions
- Mix herbs and spices and coat beef. Place beef in gallon zipper seal bag 24 hours prior to cooking. (So if you want it for dinner tomorrow at 6:00 PM, it needs to go into the bag today at 2:00 PM to allow for 2 hours to come to room temperature and 2 hours cooking time.) If you remove it sooner than 24 hours, some of the liquid that the beef gives up in this process will not have worked its way back into the meat and it will roast up dry.
- Refrigerate and after 24 hours, and two hours before serving preheat your oven to 325 degrees.
- Four hours before serving, remove the beef from the bag and pat dry with paper towels. The only liquid should be just a little surface moisture.
- Let roast come up to room temperature, about 1-2 hours.
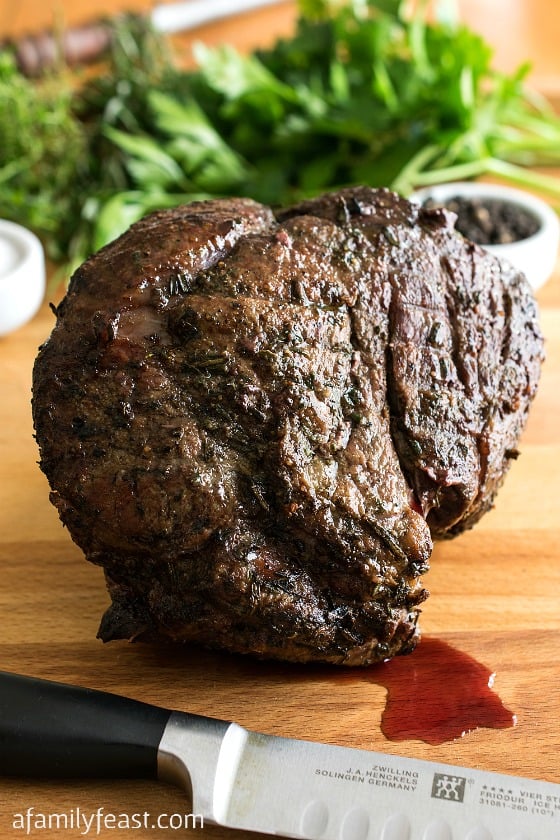
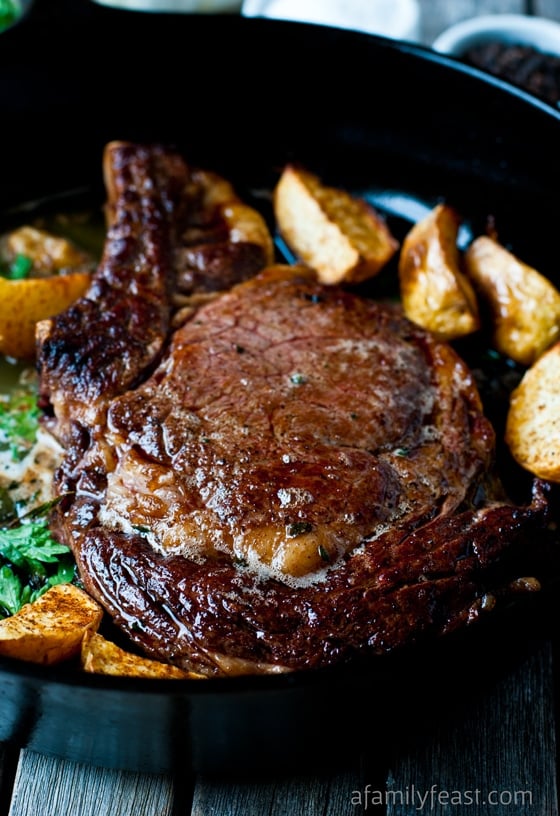
- Heat a cast iron skillet to smoking hot and add olive oil. When the oil is shimmering and hot, add beef and sear on all sides, top and bottom for about 2 minutes on each side. Have a sheet pan or roasting pan ready with an oven proof rack in it.
- Once the meat is completely seared, place on rack in pan, if using, insert remote meat thermometer
into the thickest part of the roast and place in oven. (Our roast was 3.3 pounds and took exactly 95 minutes to get to 135 degrees for medium rare.) After it is removed from oven and sits, it will cook to 145 degrees so removing at 135 is the perfect temperature. If you are not using a remote thermometer, test for doneness with probe thermometer at the 90 minute mark.
- The bits left in the cast iron skillet should be discarded. The searing process sears the meat but burns the herbs so what is left in the skillet after searing is not usable for gravy. However what drips onto the bottom of the sheet pan or roasting pan after it comes out of the oven is usable. See below for a simple gravy.
- After the roast comes out, leave thermometer inserted and tent the roast with foil. Let rest for 15 minutes. Make gravy (if desired) while the meat rests.
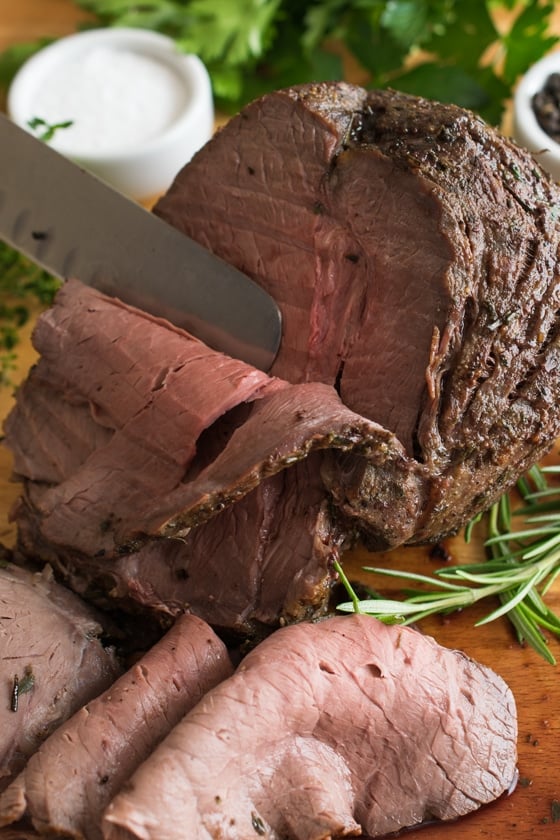
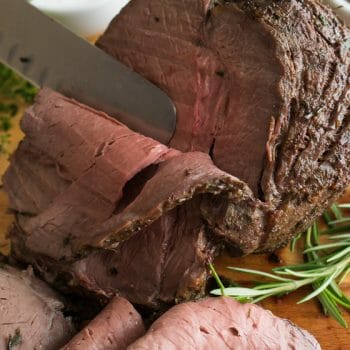
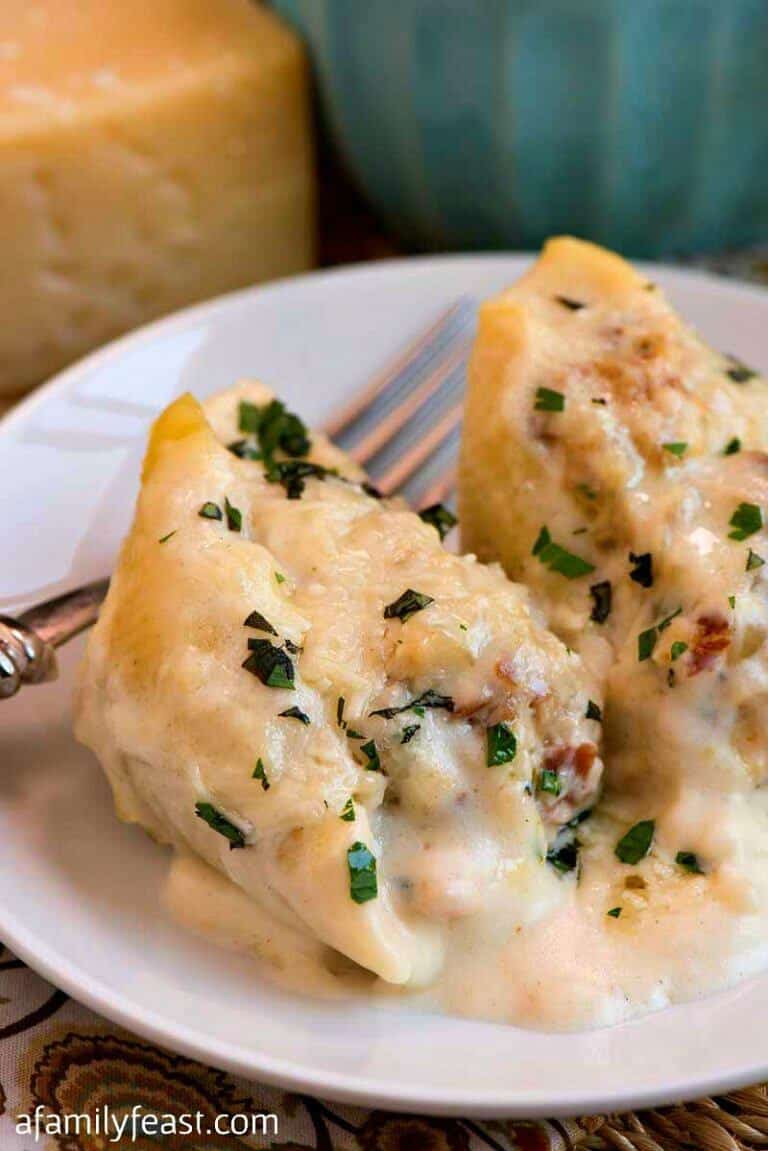
- After it rests, slice on an angle against the grain and serve. Some more liquid will drip as you slice. Add that liquid to your homemade gravy (see notes below for gravy guidelines.)
Notes
Some more notes from Jack on Top of the Round cuts:
Usually the roast is cut with two sections of beef connected by connecting tissue – a large cut and a smaller piece. The smaller piece has grain that runs in the opposite direction of the larger piece so when I carve a roast like this, I run a boning knife between the two pieces after the roast comes out of the oven and rests, and I completely separate them. Then I turn and carve each piece against the grain.
If you really want to take this to the next level and have the entire roast cook at the same doneness, you could separate these two pieces prior to roasting and pull the smaller piece out of the oven before the larger one. I have done this before if I know everyone likes the same doneness, however leaving them connected gives you medium rare from the larger piece and medium from the smaller piece for those who don’t like it too rare.
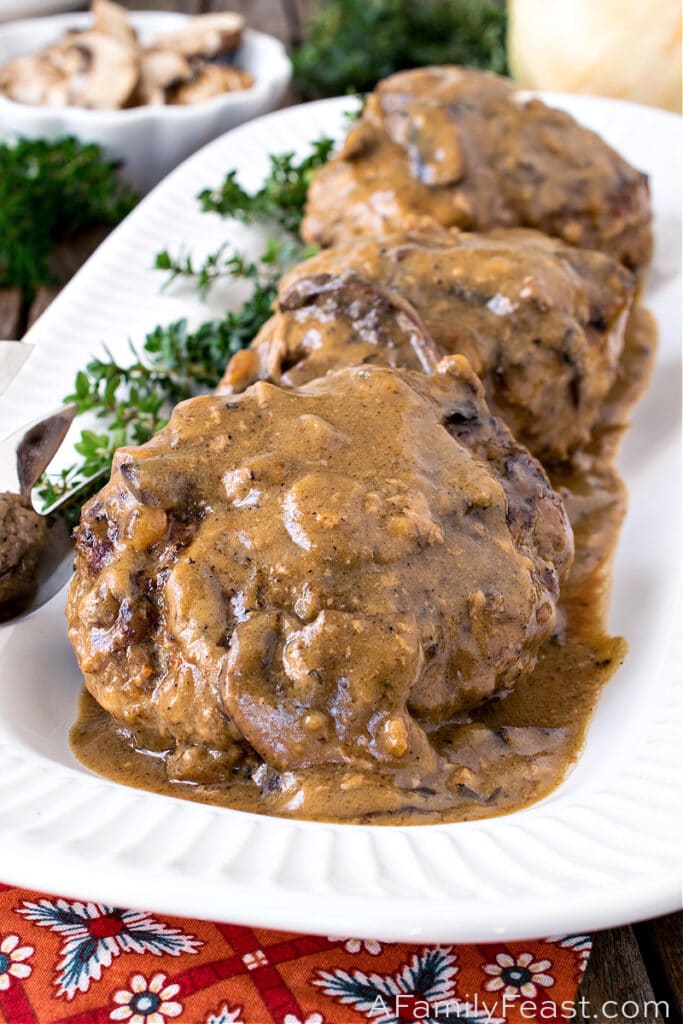
Gravy Guidelines:
For every four ounces of fat, add four ounces of flour and that will thicken one quart of liquid. This will work for any sauce using chicken stock, beef stock or milk. Reduce or add proportionally to your needs.
To make a simple gravy, in a two quart sauce pan, melt four ounces of butter and add four ounces of flour and cook over medium low heat for about five minutes until the raw flour smell is gone. Stir this often with a wooden spoon while it cooks. This is called a roux and should smell like cooked chestnuts when done. The longer you cook the roux, the darker the sauce will be. For a white sauce, cook it three minutes, for a darker gravy like for this beef, cook five minutes.
Pour off any juices from the sheet pan into another two quart sauce pan and add water or canned stock to equal one quart total liquid (half the two quart pan). Heat stock to almost boiling.
One third at a time, add hot stock to hot roux, whipping after each addition with a wire whisk. The first one will make a thick paste, the second will thin it out a bit and the third will be perfect pan gravy. Both the roux and the liquid need to be hot to avoid lumping. Adding it one third at a time will also eliminate lumping.
Season the gravy to your taste with salt, pepper or chopped parsley. If using canned stock added to pan drippings, you may want to taste first before adding salt. Let the sauce stay on low while you slice the meat. Then serve both to your guests or family.
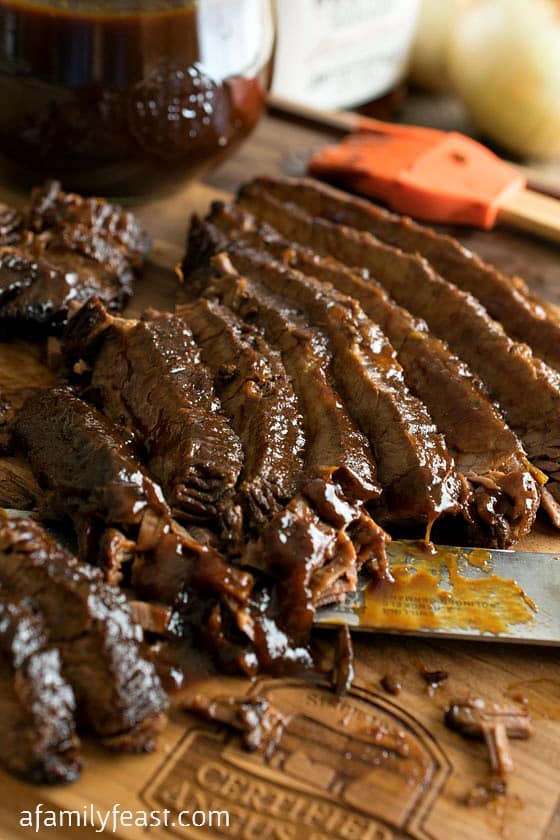
You may also like:
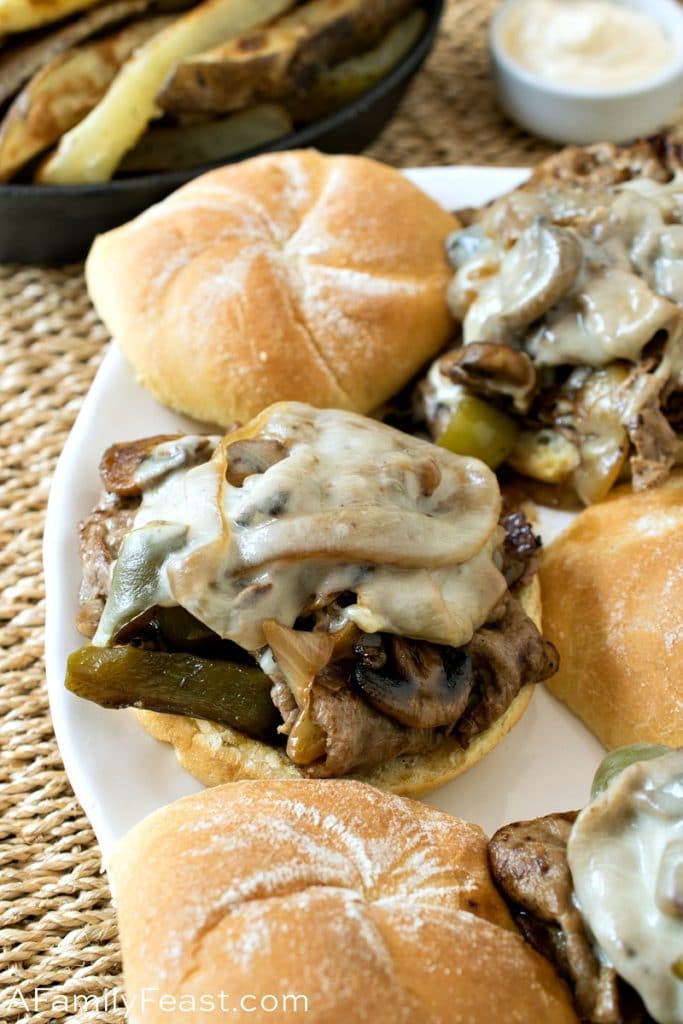
Slow Cooker Barbecue Beef Brisket

Ok I’ll try that! Great idea to try both methods! I’ll let you know how it turns out! Thank you again 🙂
You are welcome.
Thank you so much for your reply! I really appreciate the advice and tips. I definitely use an accurate thermapen as well as a leave in remote thermometer and temp everything … I know that’s key in final outcome. I think that’s a great idea to test out the chuck roll … as far as cooking it would you recommend rightly covering with foil and broth and braising or the same dry roast method as the top round? Also how do I know when it’s done and tender (I understand medium rare is out the door for that option) is there a target temp to reach? I’ve only used chuck before for fall apart pot roast and I want a finished product that’s sliceable. As far as the roasters on the counter – I know people use them to roast 20lb turkeys all the time … I did roast top round about a year ago for an event (2 20lbers in each roaster and 1 20lber in the oven) … the meat turned out a little above average for my expectations being a bit tough despite not being over cooked and trying to slice against the grain was a nightmare I believe due to the two or three different muscle groups running different ways in that large a roast … I’m hoping with your 24 hour presalting method and separating the cap after cooking like you mentioned in another comment to make slicing against the grain more manageable will take it from average to stellar! What do you think? Again … thank you for your time!
Happy to help. Any time I have ever used chuck, I have used it for stews, soups, pulled meats, pot roast, etc. so cooking for a long length of time in my opinion is the only way to get this tasty but tough meat tender. Try this, buy a chuck roll and cut off one quarter of it (assume it will be log shaped). Cook the bigger portion like you would any pot roast with foil and broth as you describe. But separately, follow the top round directions for the smaller piece and cook it to medium rare. Let it rest then slice it and see how tender it is. We know the flavor will be there, just not convinced it will slice up tender at medium rare. We may both be surprised, in which case I’ll eat my words.
Interested to see the results. Don’t be afraid to communicate back, this is what we are here for.
Hi I’m cooking roast beef for 600 people in April and due to the shear quantity will probably have to cook 20lb pieces of top round at a time in my oven and in my counter top roasters (like the ones you roast a turkey in) … my questions are do roasters with a rack on the bottom cook more like an oven or a crockpot? Would you lower the temp being such a large piece of beef? And also a butcher I talked to at Sam’s Club suggested using the 20lb chuck roll due to the better marbling and assured me it wouldn’t fall apart like pot roast if roasted whole in the 20lb and would be sliceable. I really want this meal to turn out excellent and would appreciate any tips or advice you have! Thank you!
First, a chuck roll is from a different part of the steer and must be cooked longer to get tender. Any hopes of medium rare would be out the window. A top round is the same cut of meat that you find in the deli at your local supermarket. If cooked properly, I can be incredibly tasty and does not have to be over cooked to be tender. However if it was me, I would buy a small chuck roll and test it to see if you like it before committing to buying enough for 600. The time to roast a 20 pound top round will obviously be longer than the 3-4 pound roast in our recipe because of the mass of the roast. It will take longer for the center to reach proper temperature. Suggest you roast one in advance to get your timing right, making sure you use a probe thermometer to get it fully cooked. Then you can base that timing on the rest. The oven question would be moot, as the internal temperature will dictate cooking time, however the general rule is that if the roast has enough room for the heat to circulate, it should cook the same, regardless of the oven. If you are trying to jam a 20 pound roast into a small counter top oven, it may take longer and may not cook evenly if the heat can’t properly circulate. Assume this is not the main event? If it is the main event, you are talking about somewhere between 100 and 150 pounds of beef for each person to get a four ounce portion. Can’t image cooking that much meat in a home oven and have it all be roasted properly. Either way, wish you luck!!!
Thanks for the delicious sounding recipe. I plan to make it tomorrow. BUT the only fresh herb I have is rosemary. Do you think dried thyme would be okay?
Hi Kathleen – Yes – dried thyme will still work. Typically, you would use half the amount of dried as fresh.
Question: my top round is frozen. If I thaw for 24 hours and then follow this recipe (seasoning in bag for 24 hours), will ther recipe turn out okay? Or does the meat need to brew fresh?
Hi Glenda – You do ideally want the meat to be thawed before you begin the salting process. You could try speeding up the thawing my process a bit by placing the meat in a seal plastic bag and running tepid water over it (but not hot water). Hope that helps.
This came out pretty good. I made this on a weekday so didn’t have time to let the marinade sit for 24 hours. I marinade the roast at 10pm at night, then put it in the oven at 6:30pm the next day after sitting at room temperature for 1 hr. My roast was almost 4 lbs so it was in the oven for about 2 hrs for medium rare. The roast still comes out juicy and tender. It is slightly salty on the outside when eating only the outer crust of the meat but balance well with the middle part of the meat when eaten as a whole. Hubby loves it. I will definitely make this again, but next time will let it sit for a full 24hrs to see if it makes any difference. Thank you for the recipe!
Glad you liked it TP!
Thank you for this recipe. I’ll be making it as a “side” to the Thanksgiving Turkey. I have a 5 lb roast. Based on your time I’ll try 2 hours but will be using a probe type thermometer so it will let me know when it hits 135. I’ll post after Thanksgiving with my rating. Y question is can this marinate for 48 hours?
Hi Melody, this is Jack. You can over marinate beef. Basically it breaks down the muscle to the point that the texture will not be the same. That said, this should not be a problem for this particular recipe because there is no acid in the marinade. So the short answer is, although I have never tried it, marinating 48 hours should not be an issue.
Good luck and Happy Thanksgiving.
Jack
I only have 9 hours to marinate the roast. Is it worth it to even try to get the same results or is this just too short a time?
It is possible that in nine hours, the meat will give up the liquid and then pull it back in with the spices, but also possible it won’t. Not the answer you were looking for I know. After nine hours if you pull it out of the bag and the bag is full of liquid, the roast will cook up dry. If it pulled the liquid back in and there is no liquid left in the bag, then you are good. You will need to decide to take the chance or not. Wish I had a better answer but this is food science and it does what it does.
Happy Thanksgiving
Jack
So you actually can make top round roast out of pot roast
Hi Theresa – We actually recommend using a chuck roast for a pot roast recipe as it has more fat and yields a softer texture and more flavor. You could use a top or bottom round cut and cook it like a pot roast, but it won’t be the same as using chuck. Hope that helps!
I am about to make this recipe for guests…eegad! I’m not sure what you consider med. rare. I want to be sure we have it red. I read somewhere that 120 degrees is rare. Should I take the meat out of the oven at less than that to be sure it is rare? If so, what temperature do you suggest? It’s a 6lb eye round.
The general consensus is that medium rare is between 135 and 145 degrees F. In order to achieve that, it needs to come out of the oven about 15 degrees sooner. I like rare to medium rare and usually pull mine at 120 degrees F, then let it sit for 15-20 minutes loosely tented with foil. One suggestion is that you roast it with a thermometer probe inserted from the end through the center attached to a readout with the alarm set for 120 degrees F. When you remove the roast from the oven, leave the probe in until after it rests. If you pull it right out, the juices will flow out of the hole like a faucet. For a six pound eye of the round, at a low cooking temperature, it will take 2-3 hours, maybe longer, maybe less. Since I don’t know your oven and you didn’t mention the cooking temperature, I can’t predict the exact cooking time. By the way, make sure the roast is at room temperature before roasting. Good luck, Jack.
P.S., If you make a loose fist and press down on the pad below your thumb, that is what the roast should feel like when poked for rare to medium rare. Make a tight fist and that is how it should feel for medium to well.