Today we’re going to share a technique for cooking a tender Top of the Round Roast!
The top of the round is cut from the hind quarter of a steer, and it’s a very affordable cut of beef to buy at your local grocery store. Because it’s essentially muscle meat, a top round roast is lean and very flavorful, but it lacks fat and marbleizing throughout – so it can be tougher, and not as juicy as roasts made from more expensive cuts of beef.
Top of the round roasts are often cooked at home as pot roasts where they get tender during a braising process. (Top of the round roasts are also the cut of beef that is typically sold as pre-cooked roast beef at your supermarket deli counter!)
But today, we’re sharing an alternative method – called the pre-salt method – that also makes this kind of roast more tender after cooking. Pre-salting involves coating the beef in salt, herbs and spices (almost like a dry rub) and then placing the beef in a sealed plastic food bag for 24 hours before cooking.
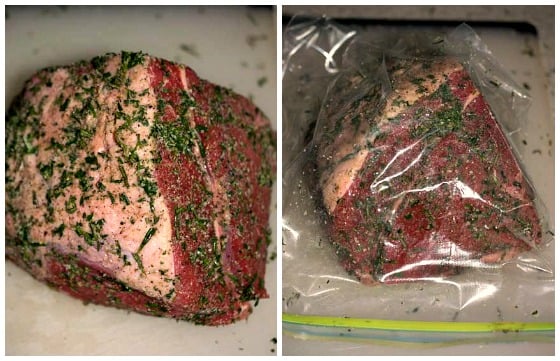
Pre-salting 24 full hours in advance does two things: It breaks the sinew of the meat down a little. And – it adds flavor to the inside of the meat.
The magic in this technique is achieved with the salt. The salt draws the liquid from the roast, grabs the flavors you have added (herbs and other seasonings) and then sends all of that flavor back into the meat. As it sits for the full 24 hours in the plastic food bag, you can watch the juices come out – but when you look at the top round roast after the 24 hours – there will be little, if any, liquid left in the bag. That is because the juices all went back into the meat.
This pre-salt method can actually be used on any meat, but not on fish. There is a slightly different method (we do not cover that in today’s post) that is used for a steak where less time is needed, but the general idea is the same.
If you decide to follow our recipe, please note that we don’t want to mislead you into thinking that your top round roast will be as tender and juicy as a more expensive rib eye roast – it simply won’t be the same as that! But for an inexpensive cut of beef like Top of the Round, this method works pretty well to make it tender for eating.
Also – below our recipe, we’ve shared some suggestions on cutting and slicing this roast. Be sure to read that as well!
PrintTop of the Round Roast
Please note: This recipe gives you proportions of salt, herbs and spices to use based on each pound of beef. Depending on the size of roast you purchase, calculate the exact amounts needed using our recipe below.
- Prep Time: 24 hours
- Cook Time: 2 hours
- Total Time: 26 hours
- Yield: 6–8 servings 1x
Ingredients
- 1 Top of the Round roast, about 3-4 pounds
- 3/4 teaspoon of kosher salt per pound of beef
- 1/4 teaspoon of freshly ground pepper per pound of beef
- 1/4 teaspoon garlic powder per pound of beef
- 1 teaspoon of fresh herbs per pound of beef (any combination of fresh thyme, parsley and rosemary)
- 2 tablespoons olive oil
Instructions
- Mix herbs and spices and coat beef. Place beef in gallon zipper seal bag 24 hours prior to cooking. (So if you want it for dinner tomorrow at 6:00 PM, it needs to go into the bag today at 2:00 PM to allow for 2 hours to come to room temperature and 2 hours cooking time.) If you remove it sooner than 24 hours, some of the liquid that the beef gives up in this process will not have worked its way back into the meat and it will roast up dry.
- Refrigerate and after 24 hours, and two hours before serving preheat your oven to 325 degrees.
- Four hours before serving, remove the beef from the bag and pat dry with paper towels. The only liquid should be just a little surface moisture.
- Let roast come up to room temperature, about 1-2 hours.
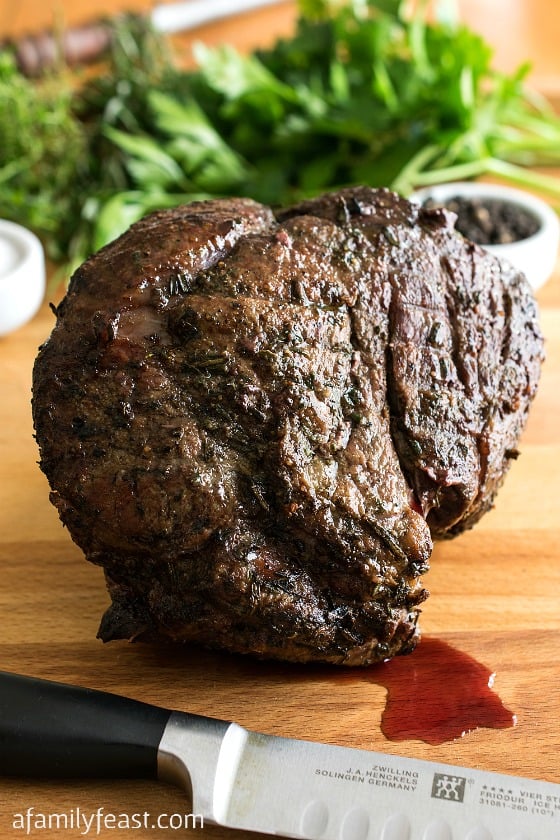
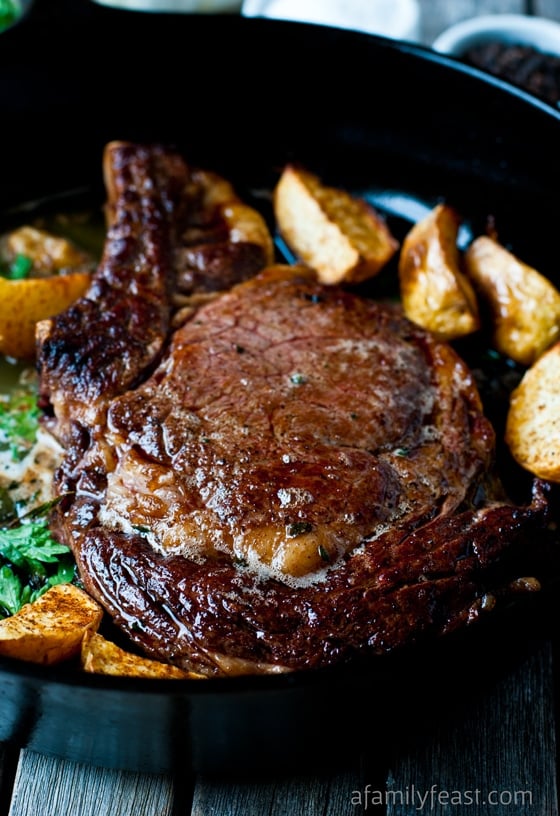
- Heat a cast iron skillet to smoking hot and add olive oil. When the oil is shimmering and hot, add beef and sear on all sides, top and bottom for about 2 minutes on each side. Have a sheet pan or roasting pan ready with an oven proof rack in it.
- Once the meat is completely seared, place on rack in pan, if using, insert remote meat thermometer
 into the thickest part of the roast and place in oven. (Our roast was 3.3 pounds and took exactly 95 minutes to get to 135 degrees for medium rare.) After it is removed from oven and sits, it will cook to 145 degrees so removing at 135 is the perfect temperature. If you are not using a remote thermometer, test for doneness with probe thermometer at the 90 minute mark.
 - The bits left in the cast iron skillet should be discarded. The searing process sears the meat but burns the herbs so what is left in the skillet after searing is not usable for gravy. However what drips onto the bottom of the sheet pan or roasting pan after it comes out of the oven is usable. See below for a simple gravy.
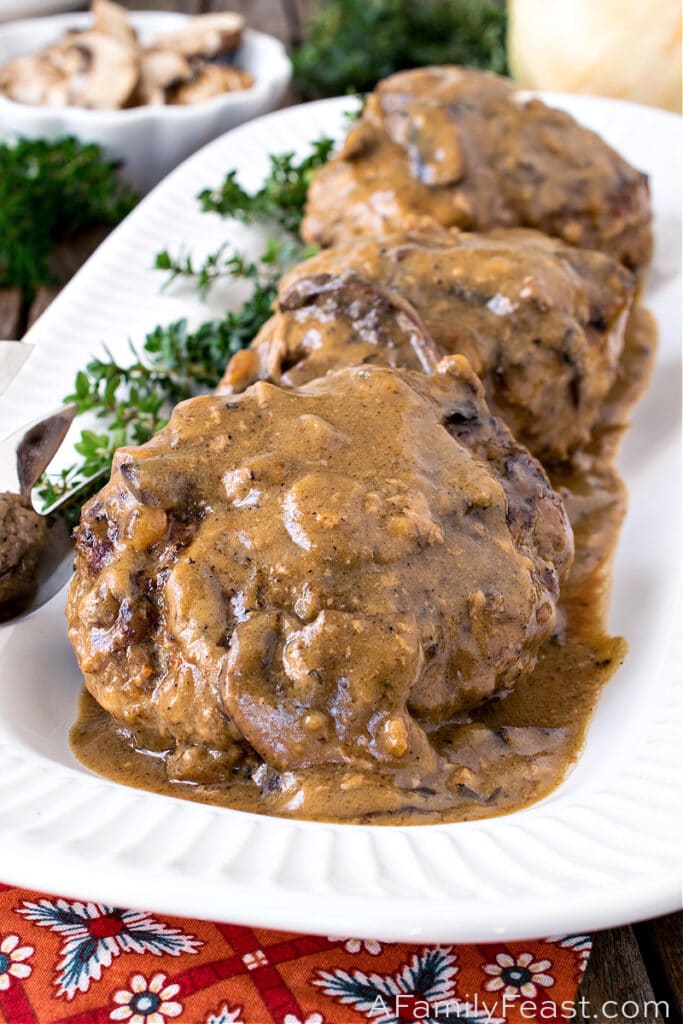
- After the roast comes out, leave thermometer inserted and tent the roast with foil. Let rest for 15 minutes. Make gravy (if desired) while the meat rests.
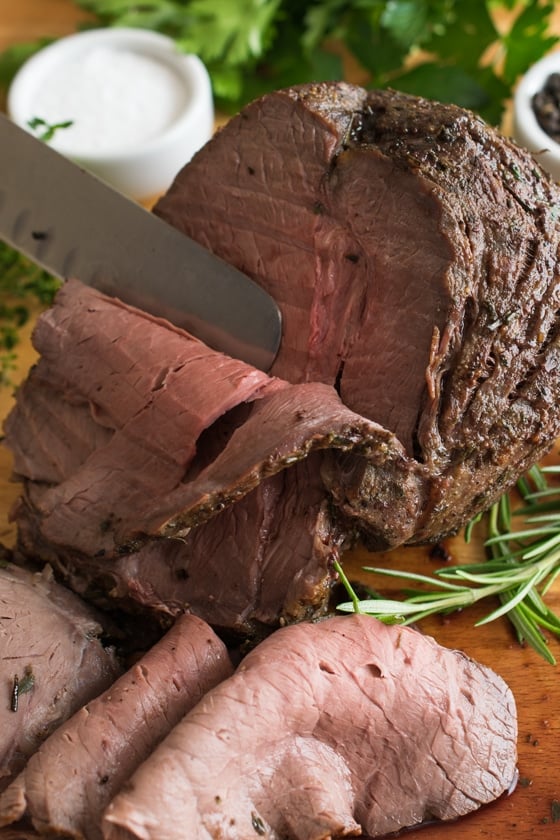
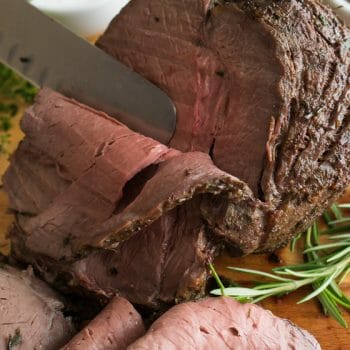
- After it rests, slice on an angle against the grain and serve. Some more liquid will drip as you slice. Add that liquid to your homemade gravy (see notes below for gravy guidelines.)
Notes
Some more notes from Jack on Top of the Round cuts:
Usually the roast is cut with two sections of beef connected by connecting tissue – a large cut and a smaller piece. The smaller piece has grain that runs in the opposite direction of the larger piece so when I carve a roast like this, I run a boning knife between the two pieces after the roast comes out of the oven and rests, and I completely separate them. Then I turn and carve each piece against the grain.
If you really want to take this to the next level and have the entire roast cook at the same doneness, you could separate these two pieces prior to roasting and pull the smaller piece out of the oven before the larger one. I have done this before if I know everyone likes the same doneness, however leaving them connected gives you medium rare from the larger piece and medium from the smaller piece for those who don’t like it too rare.
Gravy Guidelines:
For every four ounces of fat, add four ounces of flour and that will thicken one quart of liquid. This will work for any sauce using chicken stock, beef stock or milk. Reduce or add proportionally to your needs.
To make a simple gravy, in a two quart sauce pan, melt four ounces of butter and add four ounces of flour and cook over medium low heat for about five minutes until the raw flour smell is gone. Stir this often with a wooden spoon while it cooks. This is called a roux and should smell like cooked chestnuts when done. The longer you cook the roux, the darker the sauce will be. For a white sauce, cook it three minutes, for a darker gravy like for this beef, cook five minutes.
Pour off any juices from the sheet pan into another two quart sauce pan and add water or canned stock to equal one quart total liquid (half the two quart pan). Heat stock to almost boiling.
One third at a time, add hot stock to hot roux, whipping after each addition with a wire whisk. The first one will make a thick paste, the second will thin it out a bit and the third will be perfect pan gravy. Both the roux and the liquid need to be hot to avoid lumping. Adding it one third at a time will also eliminate lumping.
Season the gravy to your taste with salt, pepper or chopped parsley. If using canned stock added to pan drippings, you may want to taste first before adding salt. Let the sauce stay on low while you slice the meat. Then serve both to your guests or family.
You may also like:
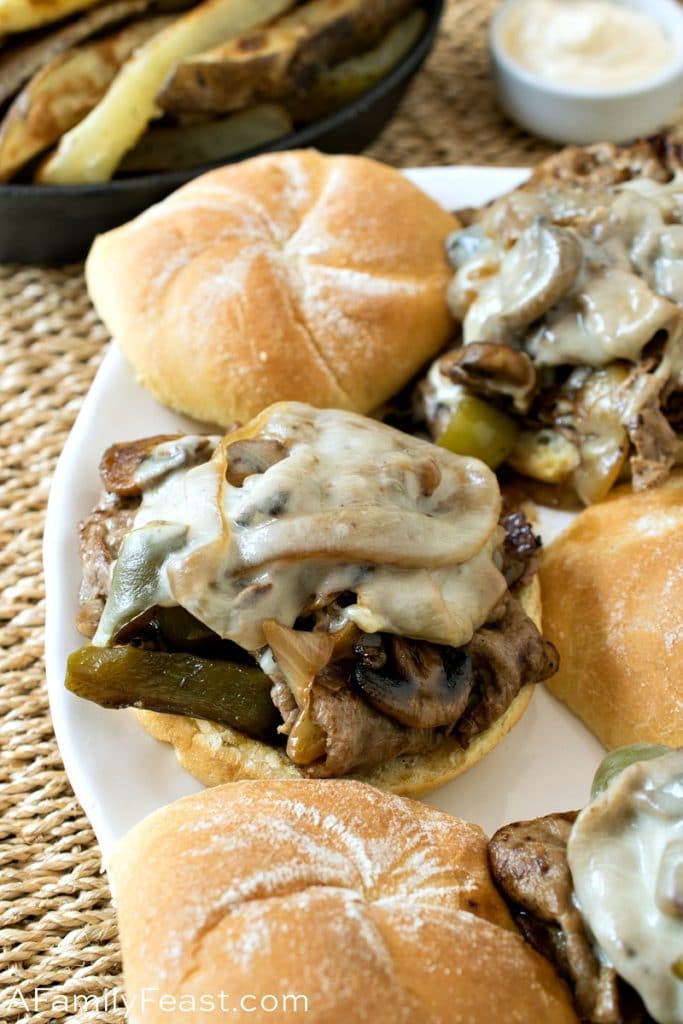
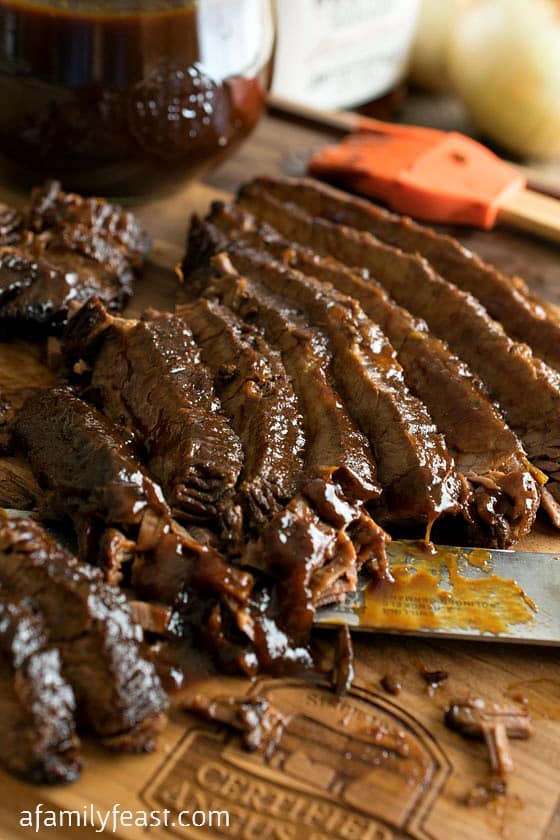
Slow Cooker Barbecue Beef Brisket
Is longer than 24 hours ok? I was hoping for more like 48.
I didn’t know if it was a minimum or a maximum.
Thanks!
Hi Nancy, this is Jack. It won’t hurt the meat to salt for that long, but it may make the meat salty and any liquid that you get after roasting will be too salty to make gravy. If you must salt it for that long, reduce the amount of salt used. Good luck!
thanks!
I’ve follow the directions for the marinade and procedure to the letter, after 24 hours I had a lot of juices in the bag. Seems like none has gone back to the meat. What did I do wrong? Can I used the marinade?
Hmmm, not sure. I’ve made this a number of times without issue. The salt draws out the liquid, grabs the herbs and pulls them back into the meat. I once left a roast too long and it gave its liquid back up. Assume you had this refrigerated.
I guess at this point, save the liquid, follow the recipe and pour that liquid into the bottom of the roasting pan just prior to putting it in the oven.
Jack
Jack, Thanks for the info but I already cook the roast. My wife use the juices to make gravy. It’s nice and spicy. Thanks again.
If I want to refrigerate to slice following day for italian beef, is there any adjustment to cooking time or set time?
Kim, this is Jack. The Italian beef uses chuck that is cooked long and slow to make fall apart tender beef. If you are using slices of cooked top round in place of the chuck, it just wouldn’t be the same. It would just be sliced roast beef with a tomato and pepperoncini topping. If however you are substituting raw top round in place of raw chuck, it would work in the recipe but may take a little longer to be fall apart tender and may be a bit dry since the chuck cut is a little more fatty than a top round. If I was using a top round for that recipe, I would probably add some additional fat but honestly, a chuck is the best option.
Hope I understood your question and answered it correctly. If not, feel free to reply. Good luck.
Came out great; thanks. Is there a way to post a photo?
So glad you enjoyed the recipe Larry! I don’t think there is a way to post a photo here in our blog comments. If you’d like, you can post it over on our Facebook page!
I followed this “to the letter”. I had an 8 pound Top Round. Backed the temperature down to 295F & added mushrooms & onions that I had stirred up with olive oil, garlic, salt & pepper, in the last hour of cooking… In the future, I will check this after 2 hours because after 3 1/2, even at 295F, it was medium well & after sitting, well done, yet amazingly tender & delicious. 🙂 Thank you for sharing this!! Will definitely use it again.
So glad you enjoyed the recipe Gretchen – even if your roast came out more done than you would have liked! I’m not sure if you have a probe thermometer – using one of those might be another way to gauge the level of doneness (vs going by cook time) for the next time. Hope that helps!
hi i have a 24.lb top round that i have never made before. so please help me how long will it take to cook.
Hi Pat – Did you mean 2.4 pounds or 24 pounds? (24 pounds is quite large!) Let us know and we can provide you with some guidelines. Thanks!
no 24.lb its for Christmas dinner alot of people.
.
Hi Patricia, this is Jack
If this were me roasting this in a home oven, I would cut it into four and roast as described in the recipe, focusing on the internal temperature. It would be easier to roast and carve. Timing would be somewhere in the neighborhood of two to three hours since the extra roasts would tax the oven a bit. If you leave it whole, again using a home oven, I would reduce the roasting temperature by 25 degrees to try and get the meat evenly roasted. Timing…I would estimate that roasting longer and lower would extend the roasting time to about 5-6 hours. If your oven has convection, then possibly shorten that time.
Wish you luck with this…Remember, use a probe thermometer to make sure the internal temperature is 135 degrees F when you remove it from the oven and that you give it time to rest to reach 145 degrees F.
thank you so much for the info will let you know how it turned out
My husband accidentally bought a top round roast instead of a pork shoulder 🙂 So happy he did! We tried your recipe tonight and it was outstanding!! Our whole family loved it and it will become part of our favorite’s list! Thank you so much.
You’re very welcome Amy! So glad you enjoyed the recipe!
Although I consider myself pretty handy in the kitchen, I haven’t made a roast beef in 20 years! I couldn’t remember how so when I came upon your recipe it sounded great. I made my roast using your seasoning ratios but had no fresh herbs in the house. So I decided to make my base thyme, parsley and ginger. Came out amazing!! Tender and juicy this recipe did not disappoint. I am adding it to my permanent collection. Thanks Martha!
We’re so glad you enjoyed the recipe! Thank you for taking the time to write to us today!
did I miss the degrees to set the oven to?
Hi Maureen – It’s part of Step #2 (325 degrees F).
When you put her roast in the oven do you leave it uncovered
The whole time?
Hi Rebekah – Yes – it should be roasted uncovered the whole time to get a nice caramelization! Thanks for asking!
I grew up with roast beef every Sunday and still love it! This looks like perfection
Thanks Leigh Anne!
I assume you are using kosher salt? Diamond, Morton?
Yes Mitch! We used Morton Kosher salt. Thanks for your question.