This post may contain affiliate links. Please read our disclosure policy.
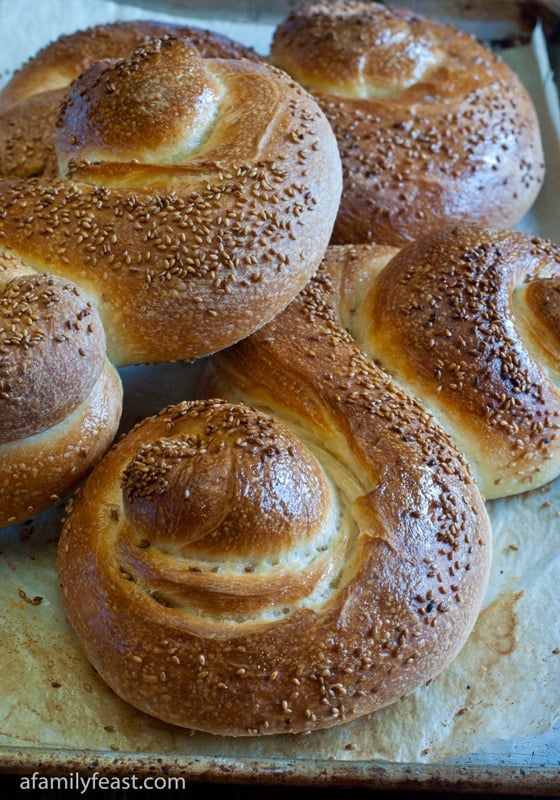
A few years back, my husband Jack decided that he wanted to perfect his bread-baking skills, so he started trying many different recipes in search of the perfect bread.
As part of that project, Jack came across the awesome cookbook, The Bread Baker’s Apprentice: Mastering the Art of Extraordinary Bread, a really great, informative book for anyone who wants to make homemade breads. This Pane Siciliano – or Sesame Seed Sicilian Bread – is by far our most favorite bread that he makes!
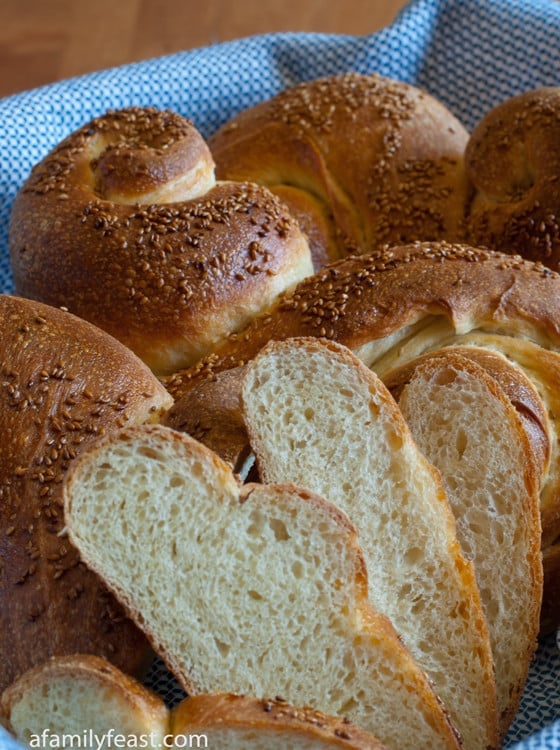
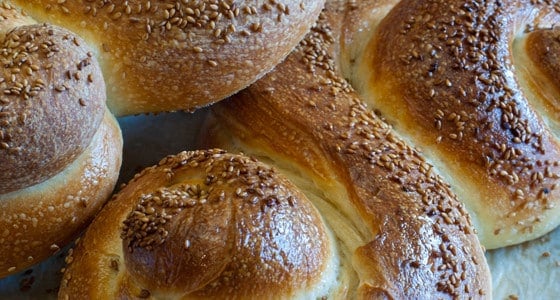
Be forewarned that this is not a quick mix-and-bake bread. The entire process (much of it letting the dough rest or rise) is spread out over three days to get the texture and taste of the bread just right. This Pane Siciliano is perfectly crusty on the outside – but not too crackly – and has a soft inside with large irregular holes. (Our idea of the perfect crusty bread!)
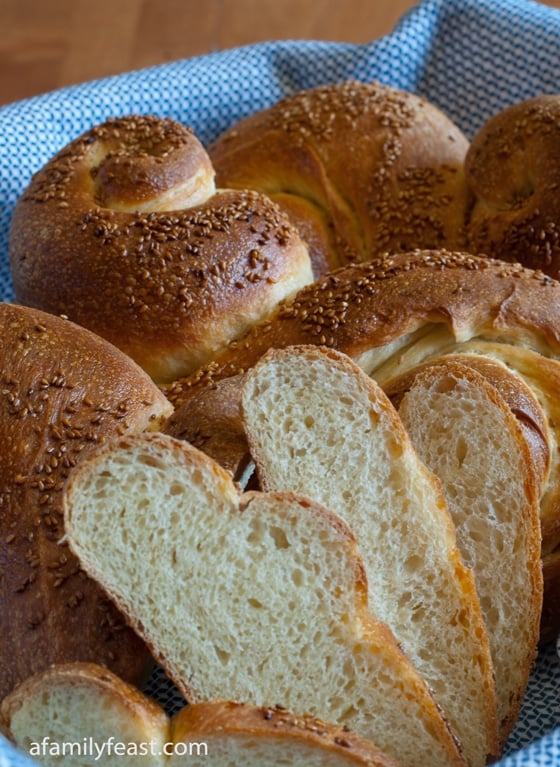
This dough is very versatile and it can be used to make a variety of breads and rolls. We’ve made it into a beautiful twisted shape here, but this dough also makes a great baguette, a large loaf, or even individual rolls.
This Pane Siciliano is so good! Back when Jack originally started making it, we once brought some loaves to a family holiday gathering and my niece Carrie absolutely fell in love with this bread! We had an extra loaf leftover, so Jack decided to give it to Carrie to take back home. On the drive home, my sister (Carrie’s mom) later told us that Carrie kept talking about “that bread” over and over again in the car – she loved it so much!
We love seeing what you made! Tag us on Instagram at @afamilyfeast or hashtag #afamilyfeast so we can see your creations!
Pane Siciliano (Sesame Seed Sicilian bread)
Ingredients
For the Pate Fermentee (used below)
- 1 1/8 cups unbleached all-purpose flour
- 1 1/8 cups unbleached bread flour
- 3/4 teaspoon of salt
- 1/2 teaspoon instant yeast
- 3/4 cup to 3/4 cup plus 2 tablespoons water (room temperature)
For the Pane Siciliano dough
- 1 3/4 cups bread flour
- 1 3/4 cups semolina flour
- 1 1/4 teaspoon salt
- 1 1/4 teaspoon instant yeast
- 2 tablespoons olive oil
- 1 tablespoon honey
- Pate Fermentee from above
- 1 1/4 to 1 1/2 cups warm water (90 to 100 degrees)
- Toasted sesame or black sesame seeds
Instructions
Day One
To Make Pate Fermentee
- In the bowl of a stand mixer with a paddle attachment, sift both flours, salt and yeast. Add ¾ cup of water.
- Mix on low speed until mixture comes together. If too dry, add additional 2 tablespoons of water a little at a time until mixture is sticky and pulling away from sides of bowl. If more water is needed, add one tablespoon at a time.
- Trade the paddle for a dough hook and mix the dough for four minutes or kneed by hand for six minutes on the counter.
- Transfer the dough to a bowl with a little bit of olive oil, turning dough so it is covered on all sides.
- Cover the bowl with plastic wrap and a dish towel and place in a warm location for about 90 minutes or until the dough rises to 1½ times its original size.
- Lightly punch the dough down and then cover. Place in the refrigerator overnight. This pre-dough can be kept in the refrigerator for up to three days or freeze for three months.
Day Two
To Prepare the Pane Siciliano Dough
- The next day and one hour before starting the bread dough, take Pate Fermentee out of the refrigerator and cut into 10 individuals pieces. Cover with plastic and a towel and let the dough warm up for one hour.
- In the bowl of a stand mixer with a paddle attachment, sift together both flours, salt and yeast. Add in olive oil, honey, Pate Fermentee pieces and 1 ¼ cups of water. Mix on low speed until mixture comes together and is tacky and sticks to the sides of the bowl. Add remaining ¼ cup of water a teaspoon at a time if needed and only if needed. Dough should be sticky not dry.
- Switch the paddle attachment for a dough hook and turn on low speed. Continue at low speed for 4-6 minutes until know is properly kneaded, or kneed by hand for 6-8 minutes. If you pull out a piece and stretch it between your hands, it should stay together and you should be able to see light through the stretched dough. If it tears, continue to kneed.
- Transfer the dough to a bowl with a little bit of olive oil turning the dough so it is covered on all sides.
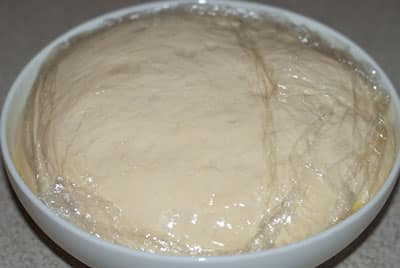
- Cover the bowl with plastic wrap and a dish towel and place in a warm place for about two hours or until the dough doubles from its original size.
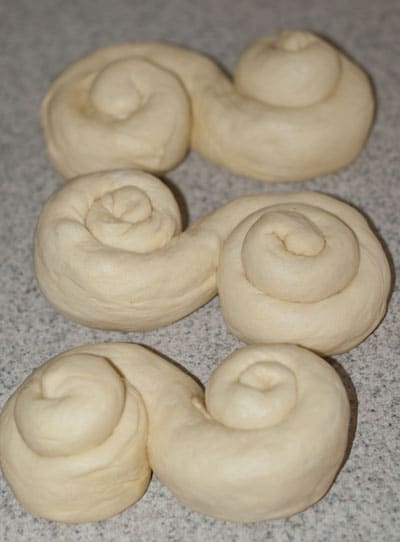
- Gently divide the dough into three equal pieces and roll out into three two foot long rolls trying not to degas the dough too much. Press a crease down the center of each roll and fold over and seal as if you were sealing and envelope ending with seam side down. If dough is not pliable enough, let rest for five minutes then continue. You want the dough to stretch and stay stretched and not bounce back or pull back.
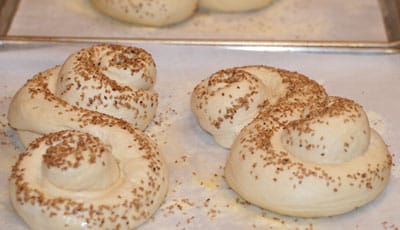
- Roll each end around pin wheel style towards the center. Each end should roll in the opposite direction of the other end so it forms the letter S. Do not roll too tight, the S loop on each end should be just one 360 degree turn.
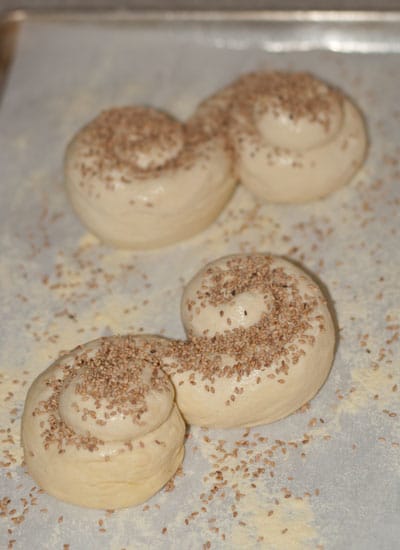
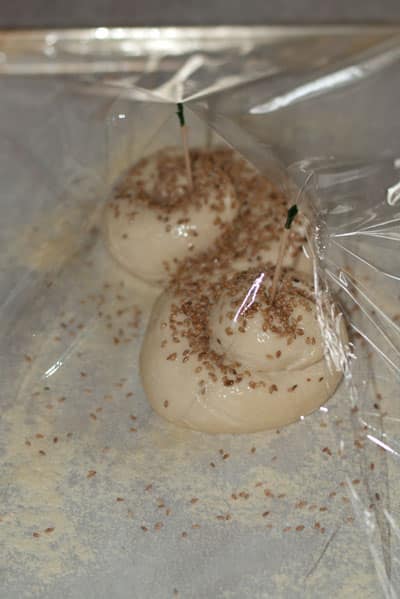
- Sprinkle two sheet pans with a little semolina flour and place two loaves of dough on one pan and the third in the center of the other pan. Leave enough room for the bread to double in size.
- Mist the top of each dough with water and sprinkle sesame seeds over.
- Spray the tops with pan spray so plastic wrap does not stick.
- Stick a tooth pick or two into each dough and cover pan with plastic wrap.
- Place pans in the refrigerator overnight.
Day Three
To Make the Baked Loaves – To recreate “Hearth Style Baking” follow the below steps.
- Remove the three pans from the refrigerator and bring up to room temperature (a few hours) The dough should be twice the size as the day before and when poked, should not spring back.
- Place the oven rack in the middle of the oven and place a shallow roasting pan or a cast iron pan in the bottom of the oven. Preheat the oven to 500 degrees.
- Fill a teapot with water and bring to a boil. Fill a water mister with water.
- Once the oven is hot and the water is hot, uncover the dough and remove the tooth picks.
- Working quickly, place the bread dough onto the middle rack and pour a cup of hot water into the pan at the bottom of the oven and close the door. After 30 seconds, spray the oven walls with the mister and close the door. Repeat twice more at 30 second intervals.
- After the final spray, lower the oven temperature to 450 and bake for 15 minutes. Rotate the pan 180 degrees. At this point, if the loaves are touching, separate them slightly.
- Bake for another 10-15 minutes more until the loaves are rich and golden brown all over. If there are still white parts, extend the baking time a few extra minutes. Internal bread temp should be between 200 and 205 degrees using a probe thermometer.
- Remove the pans and transfer the bread to a cooling rack and cool for 45 minutes.
- Note: If you have the standard home oven, bake the two pans separately to make sure the heat and moisture are dispersed properly. If you have a larger oven, bake both pans together. All of the steps in this very long recipe are absolutely necessary for a superior finished product. Spray a fine mist of non-stick cooking spray (such as Pam) to give the loaves a fine sheen.
Last Step! Please leave a review and rating letting us know how you liked this recipe! This helps our business thrive & continue providing free recipes.
You may also like:

I would love to try this recipe for a Sicilian-themed dinner with our international dinner group. But have a question because I won’t be home much the day before.
Once you prepare the bread dough for Day 2 – is it possible to refrigerate for one day – and then complete Day 3 directions after it has been in the refrigerator for a day?
The gluten May develop a little bit more in that extra time, causing the finished bread to be puffier, but it won’t hurt the overall product.
Plan on making this bread real soon .
My question is why use so little semolina four ? Advantages, disadvantages ?
Hi Mike – In this case, we followed the recipe exactly as written in The Bread Baker’s Apprentice cookbook – every recipe we’ve ever made from this cookbook has been perfection, so we didn’t feel the need to change a thing.
I just went back to read the original recipe head notes in the cookbook, and the author didn’t specifically discuss different proportions of flour and semolina in this recipe, although he notes that the semolina helps give the exterior crust of this bread a sweet, nutty quality, and it has a beautiful blistered crust (not too crackly) while the inside has large, irregular holes similar to a good French or Italian loaf. I have no doubt he tested this recipe many times to figure out the best proportions to achieve the textures and tastes he wanted.
You might enjoy the cookbook – in addition to some great recipes, there is a large intro section on different flours, techniques, formulas, etc. that – given your question – you might enjoy! It’s a vast amount of information – far to much for me to recap in this response. Hope that helps at least a little bit.
Hey!
We used to go to to visit family in a small town in Sicily every year. This bread is the closest looking I’ve seen to what is in the Paneficio there!
I have a question about durum and semolina flour. You call for Semolina flour which I think is a coarse grind of durum wheat. Locally, I can get “Durum Extra Fancy” which is a fine grind of durum wheat. Did you use the coarse semolina grind, or the finer extra fancy durum grind?
Thank you!
Hi Sean – Great question. We used Bob’s Red Mill Semolina Flour in our recipe, which is a finer grind. I hope that helps clarify!
I’m curious about making this as a simpler shape, i.e. 1 or 2 plain breads (still with the sesame topping). Have you done this? The recipe looks delicious but thinking of simplifying. Thanks!
Hi Deb – You can definitely shape this into a simpler loaf with the sesame topping. We’ve done it ourselves and it works fine. Enjoy!
Jack and MarthaI just got the answer to my question after reading and finally getting to see someone else’s question about how to fold the bread, however I would love to know would I possibly be able to fill the spread and make individual rolls filled with prosciutto or ham and different types of cheese and do the misting in the oven and baking them please let me know if you’ve ever tried this
Glad you found the answer Tere – we haven’t tried adding fillings or made this as individual rolls. If you try it, please let us know how it comes out!
Martha I just came across your recipe for your Sicilian sesame seed bread, it looks amazing I definitely want to make it I have all the ingredients however I don’t understand when you say to put a crease down the center of the dowel on the three pieces and then fold over like envelope style with the seam on the bottom, could you please explain that or give a better diagram I don’t know whether to just fold it in half and press it and then shape it like an ass the envelope part doesn’t make sense to me please elaborate I want to try this bread so desperately it looks amazing thank you so much for all your amazing recipes
I am ready to make the Pane Siciliano and have a question on step 6 for day 2. After dividing into 3 am I rolling into a 2 foot long log vs. roll? Then is the crease lengthwise on the log and I am folding over and sealing such that I end up with a 2 foot long roll again?
Finally, a local craft bakery called the Crust has a similar bread only they add toasted sesame into the dough as well as spinkled on the outside. Thought that would be interesting and wondered if you ever tried that.
Thanks, Ray
I could have been clearer in my instructions. I may make this again at some point and take a lot of process pictures. After dividing the dough into three, each should be formed into a two foot long log, without letting too much gas escape, be gentle. Then make a crease down the length of each log and pull the sides up and pinch together. Then roll over crease side down. Don’t roll again.
I haven’t tried adding the sesame seeds to the dough, I would imagine it may affect the texture and rise time a bit so would need to experiment to get it perfect. Baking bread is such a precise art that small variations sometimes have disastrous results. I once attempted a barley bread from scratch without using any sort of a guide. It was so bad, even the birds wouldn’t eat it when I tossed it into the back yard.
Good luck with your bread.
Jack
OMG Martha! I decided That I’d like to start baking my own bread for my New Year of 2018. I proceeded to buy some books about bread baking, and eventually discovered Peter Reinhart. To me, he’s the absolute God of bread. Way more knowledgeable than any others, including Cook’s Illustrated. Bread is his calling. I’ve checked several of his books out of the library, but decided that I needed to own “The Bread Baker’s Apprentice” as well. I will try this bread. Please tell Jack that his recipe for bagels is beyond belief!
Hi Heather! Nice to hear from you! I’ll be sure to let Jack know about the bagel recipe…it’s probably one of the few recipes from the cookbook we haven’t tried yet! Thanks for the suggestion!
Did you give these loaves a final misting as they came out of the oven? Not quite sure if that is the intent of the last sentence of the recipe.
Hi Jeanette – Sorry for the confusion! What we meant was spray the finished loaves with non-stick cooking spray such as Pam to give the finished loaf a glistened appearance. I will update the recipe!
Thanks for visiting our site!
Martha
gorgeous rolls! I love the shape – they would be perfect for dinner for 2 :-). And the crumb is so beautiful!
Thank you!