How to make Perfect Herb Roasted Chicken. This is a recipe everyone should have in their collection!
This Perfect Herb Roasted Chicken is sponsored by Peapod. All opinions are 100% mine.
Say the words “comfort food” and what comes to mind? Maybe a hearty stew? Or a cheesy pasta dish? Or how about a sweet and delicious baked apple bread?
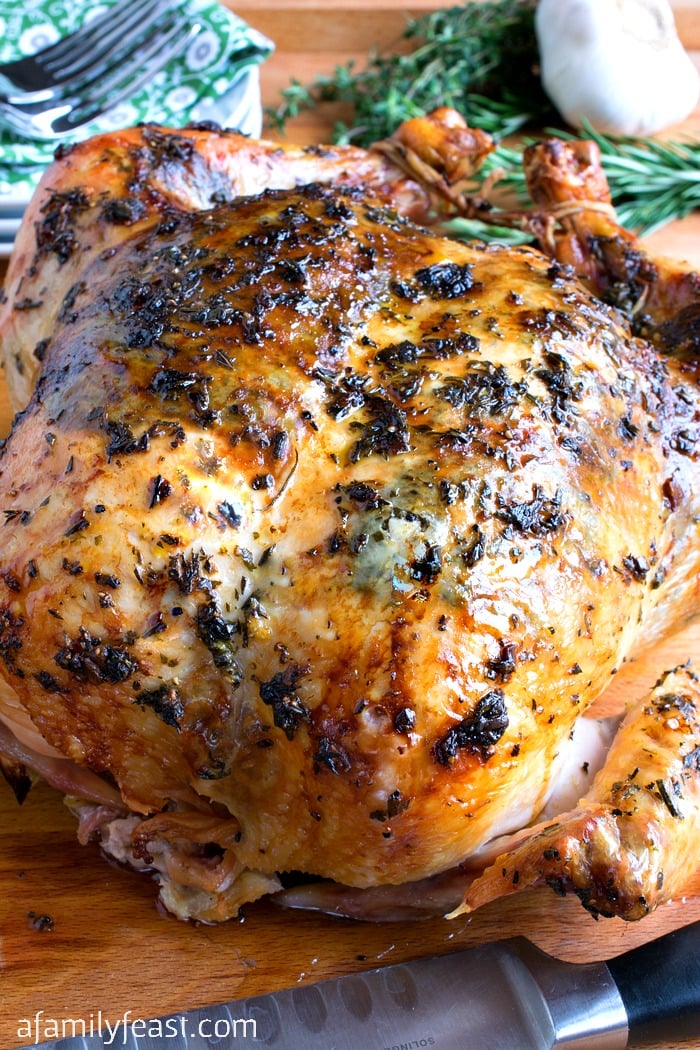
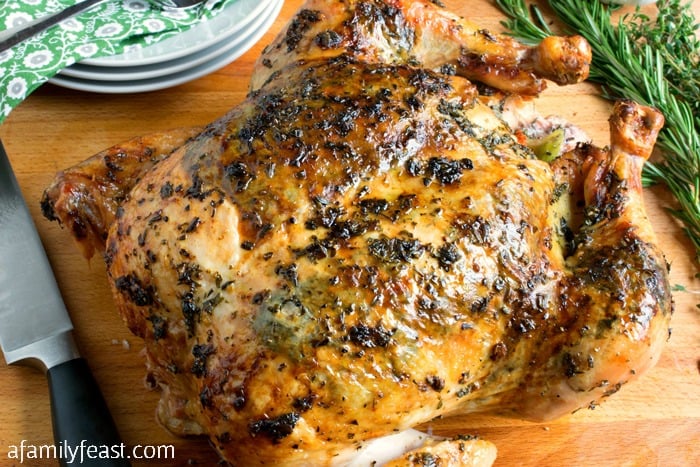
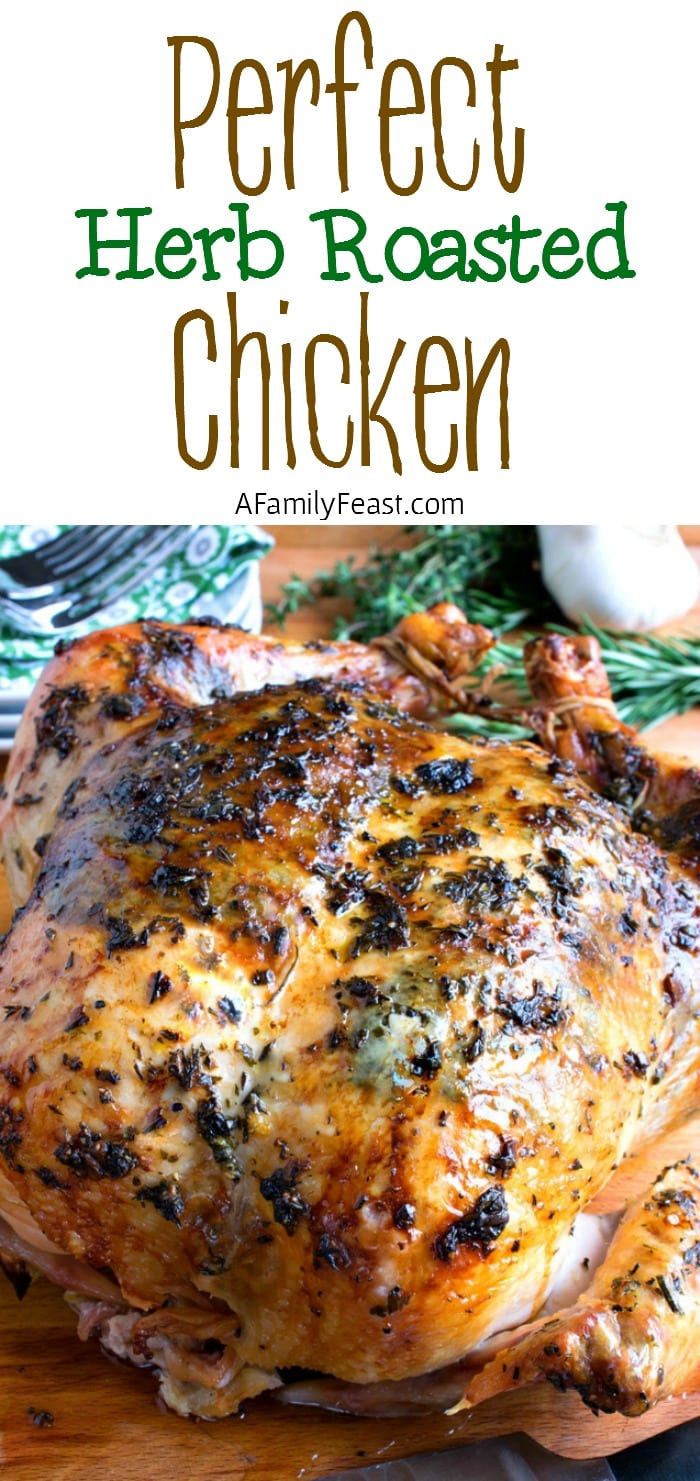
For me, a Perfect Herb Roasted Chicken is my idea of the absolute best comfort food! There’s nothing better than the aroma of a tender, juicy chicken roasting in the oven – and the anticipation of enjoying a delicious family dinner. Better yet – cooking a Perfect Herb Roasted Chicken is actually very easy to do.
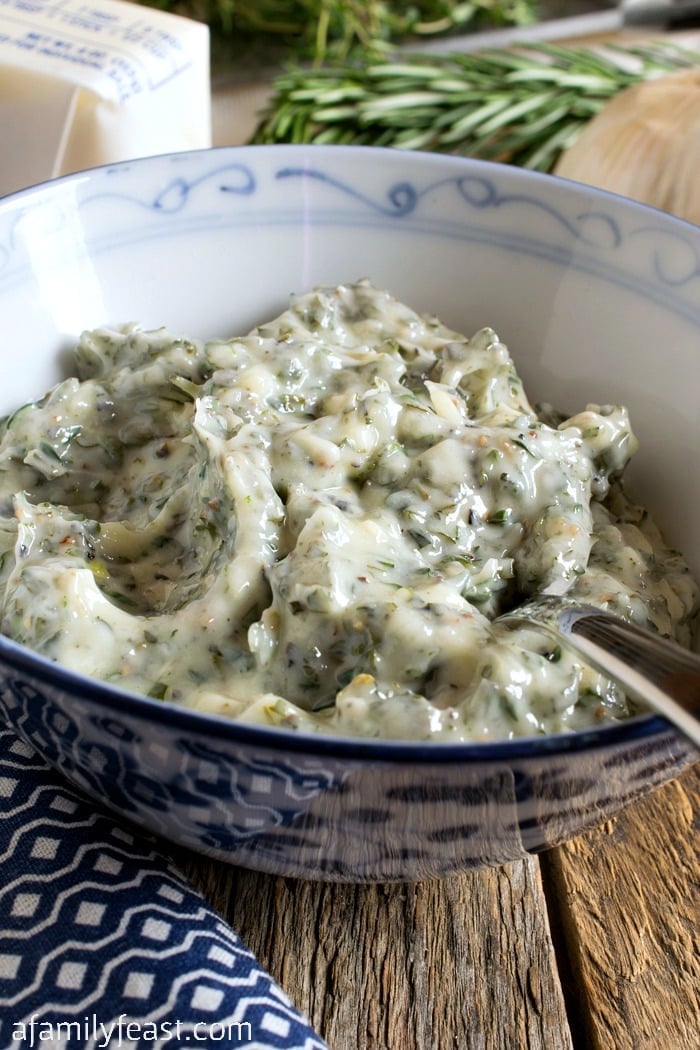
We start by mixing a variety of fresh herbs, garlic and seasonings in some softened room-temperature butter.
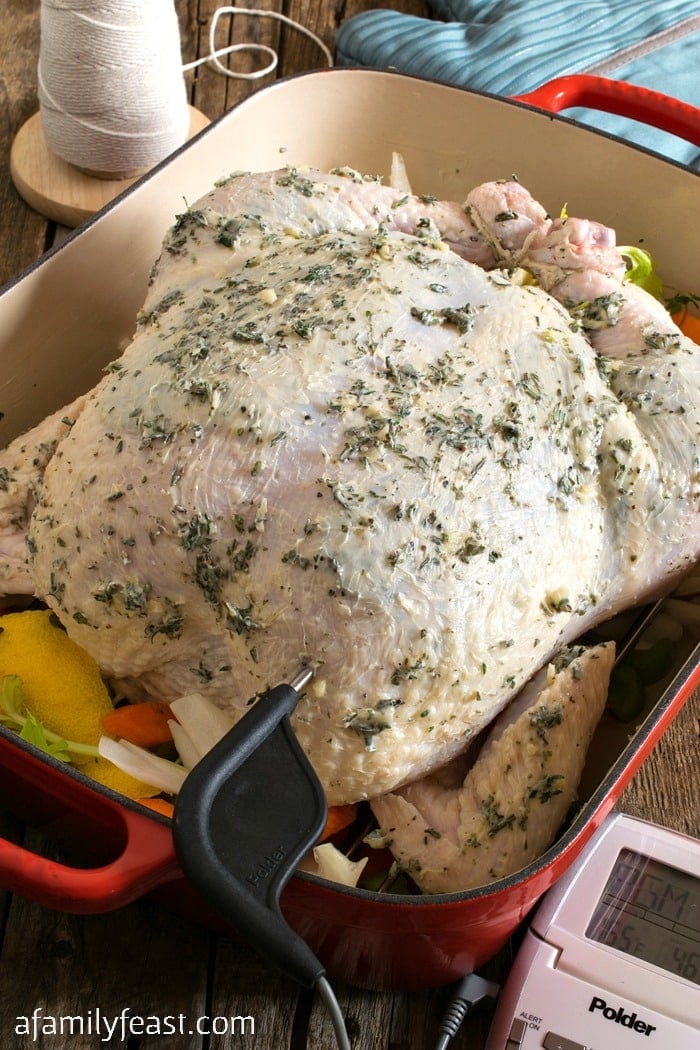
Then, place a large roasting chicken in a pan on a bed of onions, carrots, celery stalks and lemon rind. You’ll also want to place a few of the vegetables and poultry herbs inside the cavity of the chicken. Next, spread the herb and butter mixture over and under the skin of the chicken. Then insert a meat thermometer into the breast of the bird before roasting in the oven until perfectly golden, juicy and tender.

We ordered everything to make this delicious recipe from Peapod’s grocery delivery service.
Right from the comfort of your own home, you can order thousands of grocery items, as well as other kitchen items such as roasting pans, meat thermometers, kitchen twine and more. Then – arrange delivery to your home when it is most convenient for you.
Perfect Herb Roasted Chicken

How to make Perfect Herb Roasted Chicken. This is a recipe everyone should have in their collection!
- Prep Time: 30 minutes
- Cook Time: 2 hours
- Total Time: 2 hours 30 minutes
- Yield: 6 servings 1x
- Category: entree
- Method: Roasting
- Cuisine: American
Ingredients
1 large roasting chicken (approximately 9 pounds)
1 stick (1/2 cup) unsalted butter, softened to room temperature
1/4 cup finely chopped fresh herbs (rosemary, sage, thyme and parsley or poultry blend) plus some additional stems of fresh herbs to place in chicken cavity
1 teaspoon kosher salt
1 teaspoon freshly ground black pepper
1 tablespoon garlic, finely minced
1/2 of a large onion, cut into quarter-inch vertical slices
2 medium carrots, peeled and sliced
2 celery stalks sliced (include celery leaves)
Rind of one lemon (just use a peeler to peel off pieces of outer rind)
Water as needed
Instructions
- Remove giblets from chicken cavity and save for another recipe or discard. Rinse the chicken with cold running water and pat completely dry with paper towels.
- Place the softened butter in a medium bowl and add the fresh chopped herbs, salt, pepper and garlic and stir to combine.
- Preheat the oven to 375 degrees F.
- Place most of the vegetables in the bottom of a roasting pan and place a flat rack over them. Reserve a few of the vegetables for the chicken cavity.
- Set the chicken onto the rack and place the few reserved vegetables along with a few sprigs of fresh herbs into the cavity. Place a few lemon rinds in there as well and spread the remaining rinds around the outside of the chicken. Do not over fill the cavity. (You want just enough to add flavor; too stuffed and the inside will not fully cook.)
- Tuck the wing tips under the chicken.
- Use your fingers to separate the skin from the meat but be gentle leaving the skin intact and not ripped. Use an upside down long spoon to reach the back. Also run your fingers around each thigh and leg as far as you can reach to separate the skin from the meat.
- Use a spoon to spoon half the butter mixture under the skin, using your fingers and the spoon to spread evenly.
- Spread the remaining butter over the top of the chicken covering all skin.
- Using kitchen twine, tie the ends of both legs together tightly.
- Place a probe thermometer into the thickest part of the chicken and set the alarm temperature for 160 degrees F.
- Roast for 45 minutes uncovered then add two cups of water to the pan under the chicken. The water is not placed in at the beginning so the skin crisps first before adding moisture.
- Throughout the remaining roasting time, if the water evaporates, add a cup more at a time so the bottom of the pan does not burn.
- The total cooking time will be about two hours. If the chicken gets too browned before reaching 160 degrees, loosely tent with foil.
- Once at 160, remove from the oven, leave the probe in, loosely tent with foil and let rest 20 minutes. While it rests, the temperature should rise to slightly above 165 degrees F which is the USDA’s recommended cooking temperature of cooked chicken.
- After twenty minutes, remove probe and foil and begin carving.
You may enjoy these other recipes made with groceries from Peapod:
Slow Cooker Tex-Mex Chicken Stew


What is a flat rack?
Hi Marian – Here is a link to Amazon showing you the flat roasting rack we use: https://amzn.to/480PuzE – hope this helps.
I’ve made this recipe about 5 times now, and even when I don’t follow it exactly or take a few creative liberties, it always comes out fantastically 🩷
Thanks Sera – glad you enjoyed the recipe and totally agree – it can be easily adapted with different herbs and spices.
where do you a 9 pound chicken?
Hi Karen -I’m guessing you meant to as us where we buy a 9 pound chicken? Our local supermarket sells them…you could ask the butcher at the market if you don’t see any out in the coolers. Hope that helps.
When my children come here I will make this!
Hope they enjoy the chicken Heather!
Hi Martha,
I love all of your tips when
shopping. You are so right about
returning to an aisle that I already been down so keep all the meats, canned goodsEm and vegtables together on the shopping list.
Rose
So glad it was helpful Rose!
Fantastic
THanks!
You shouldn’t wash raw chicken as it spreads bacteria onto your hands, and other surfaces in the kitchen. See this advice from the NHS https://www.nhs.uk/live-well/eat-well/never-wash-raw-chicken/
Apart from that the recipe sounds good and I am going to try it later.
Thanks Mark!
I am 62 and have always loved egg salad. But always added too much of this or that. And never cook the eggs right which I did not know till your egg salad. Girl, you rocked my world. made it just as you said did not agree it would work. The eggs wow crazy good. Wanted to just eat them but I did as you said. At ten at night with chips, I had a moment of pure joy. This is what food is all about joy and this old dog learned a new trick. Thank you
You’re very welcome Michelle! 🙂 So glad you are enjoying the recipes!
I have made this chicken on multiple occasions, for my family and for guests. It is flavorful, moist and delicious EVERY time!
So glad you are enjoying the recipe Gail!
Wow, Martha, that chicken is a beauty. I have been perfecting my roast chicken skills since giving up buying them at Costco. Don’t get me wrong, those are tasty, but I prefer fresh herbs and butter. My mouth is watering just reading your recipe.
Linda
Thanks Linda! I hope you’ll give the recipe a try! 🙂
I will always wash my poultry. I have never had any problems with “spreading” germs.
This is in response to the comment from another post
The thought of cooking a raw chickan before washing is ridulous.
Thanks for your feedback Marian. There are definitely two schools of thought about whether washing chicken is necessary or not. Every home cook should always make their own decisions regardless of what information they read online.
As an infectious diseases physician, I have to agree with the previous commenter. When you wash a raw chicken, you hardly remove any bacteria – they’re very sticky. What you do do is splash them all around the sink and surrounding areas. From there, unless you clean up thoroughly with bleach, there’s a risk of contaminating other food in which they can multiply. We’re talking salmonella, campylobacter and E. coli. It’s much safer to just put the chicken into the oven where all those bacteria will be killed.
Thanks for your comment Ben.