Today we’re sharing our tips and tricks for preparing Perfect Pork Tenderloin at home. There’s no need to overcook pork anymore!
Today we’re sharing our tips and tricks for preparing Perfect Pork Tenderloin at home. Pork tenderloin is very easy to make, delicious, and great served with just about any kind of side dish your family enjoys.
This Perfect Pork Tenderloin method has been a favorite of ours for a long time – in fact, anytime we make this recipe, Jack and I have a good chuckle with each other! Here’s our story:
Years ago, Jack and I lived in small apartment while we saved up money for our house down payment. The kitchen was the size of a closet with poor ventilation and super-sensitive smoke detectors.
One night, I was making this recipe for dinner and – as usual – I set off the smoke detector in the apartment while I seared the pork tenderloin! To clear the kitchen of smoke, I opened the door to the hallway that led out to the other apartments – and promptly set off the smoke detectors in the ENTIRE apartment complex!
Needless to say – I was super embarrassed when we evacuated outside (along with dozens of other apartment dwellers), and I had to tell the fire department that it was just me cooking dinner and I set off the alarm! Fast forward to today – and we’re showing you the proper method to make perfect pork tenderloin without involving your local fire department! 🙂
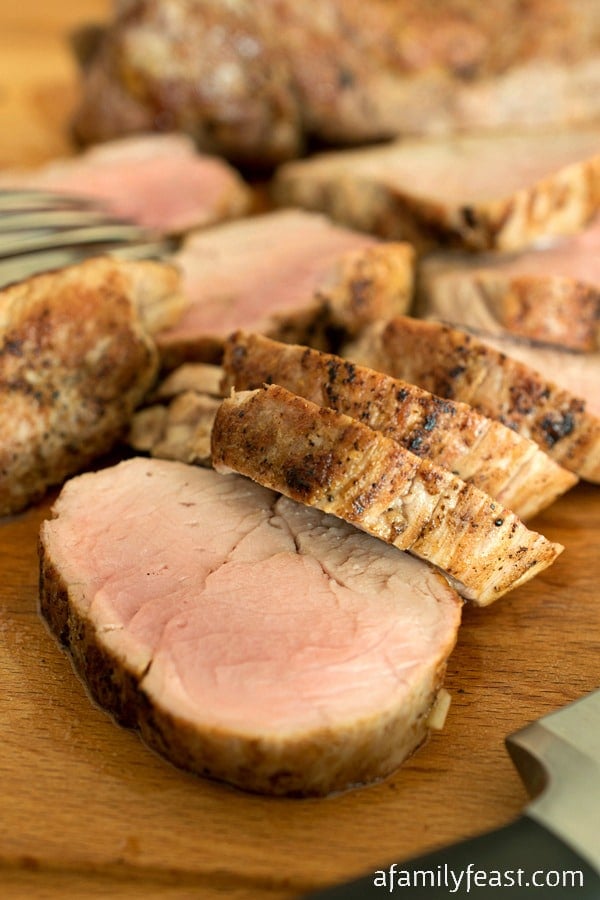
One final note: There is nothing worse than over-cooked, dry pork tenderloin! But many people still cook pork until it is no longer pink on the inside because in the past, people were concerned about getting trichinosis by eating pork from pigs that were given food scraps to eat. Today, because of advances in food safety and because USDA certified animals are fed grain, the USDA guidelines now state that pork can be safely consumed when cooked to an internal temperature of 145 degrees F with a resting time of three minutes. You can read more here.
Perfect Pork Tenderloin

Today we’re sharing our tips and tricks for preparing Perfect Pork Tenderloin at home. There’s no need to overcook pork anymore!
- Prep Time: 5 mins
- Cook Time: 20 mins
- Total Time: 25 minutes
- Yield: 4 servings 1x
- Category: entree
- Method: Oven Roasted
- Cuisine: American
Ingredients
- One pork tenderloin, approximately 1 1/2 pounds
- Extra virgin olive oil
- Kosher salt
- Freshly ground black pepper
- Garlic powder, optional
Pan Sauce
- 1/4 cup white wine
- 2 tablespoons cold butter
Instructions
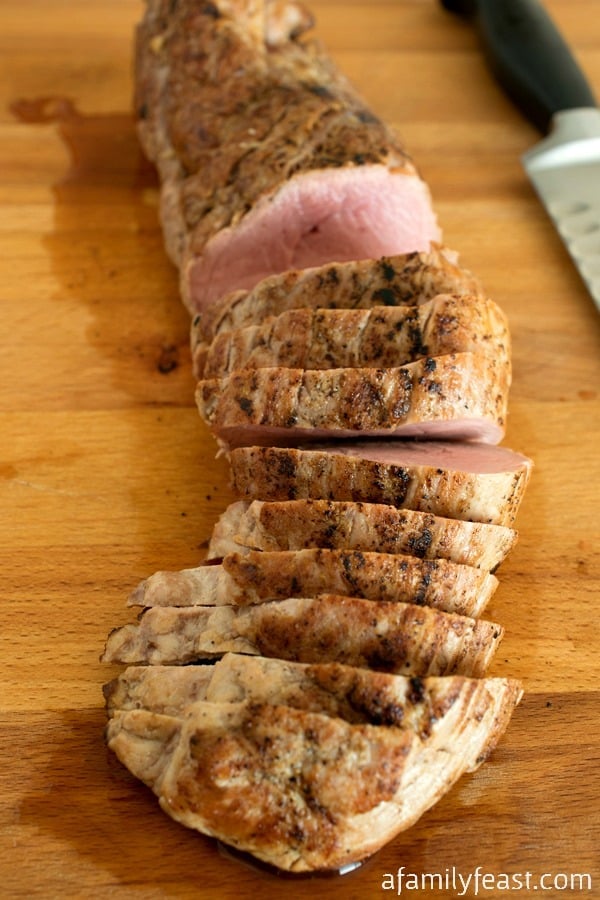
- Typically pork tenderloins come two to a package, however I have seen them sold individually. Remove the pork from the package and place on a cutting board with the silver skin facing up.

- With a very sharp boning knife, or similar shaped knife, remove silver skin by sliding the knife tip under one end of the silver skin. Keep the blade flat (parallel to the meat) and slide the knife between the meat and the silver skin, pulling up on the silver skin as you go. Discard silver skin. Also remove any excess fat if any.
- Preheat oven to 375 degrees F.
- Jack was always taught to oil the meat not the pan (which is maybe why Martha got the fire department involved all those years ago) so after trimming the meat, brush it all over with a generous amount of olive oil, then sprinkle with kosher salt, black pepper and optional garlic powder.
- Heat a large oven proof skillet or fry pan over high heat until smoking hot. Drop a few drops of water in and if they instantly evaporate, the pan is ready.
- Carefully place the tenderloin in the pan and don’t move it for 1 ½ minutes. Then turn it totally over and cook 1 ½ more minutes. Turn a quarter turn and cook for another 1 ½ minutes. Turn it to cook the last side then take the whole pan and place in the pre-heated oven.

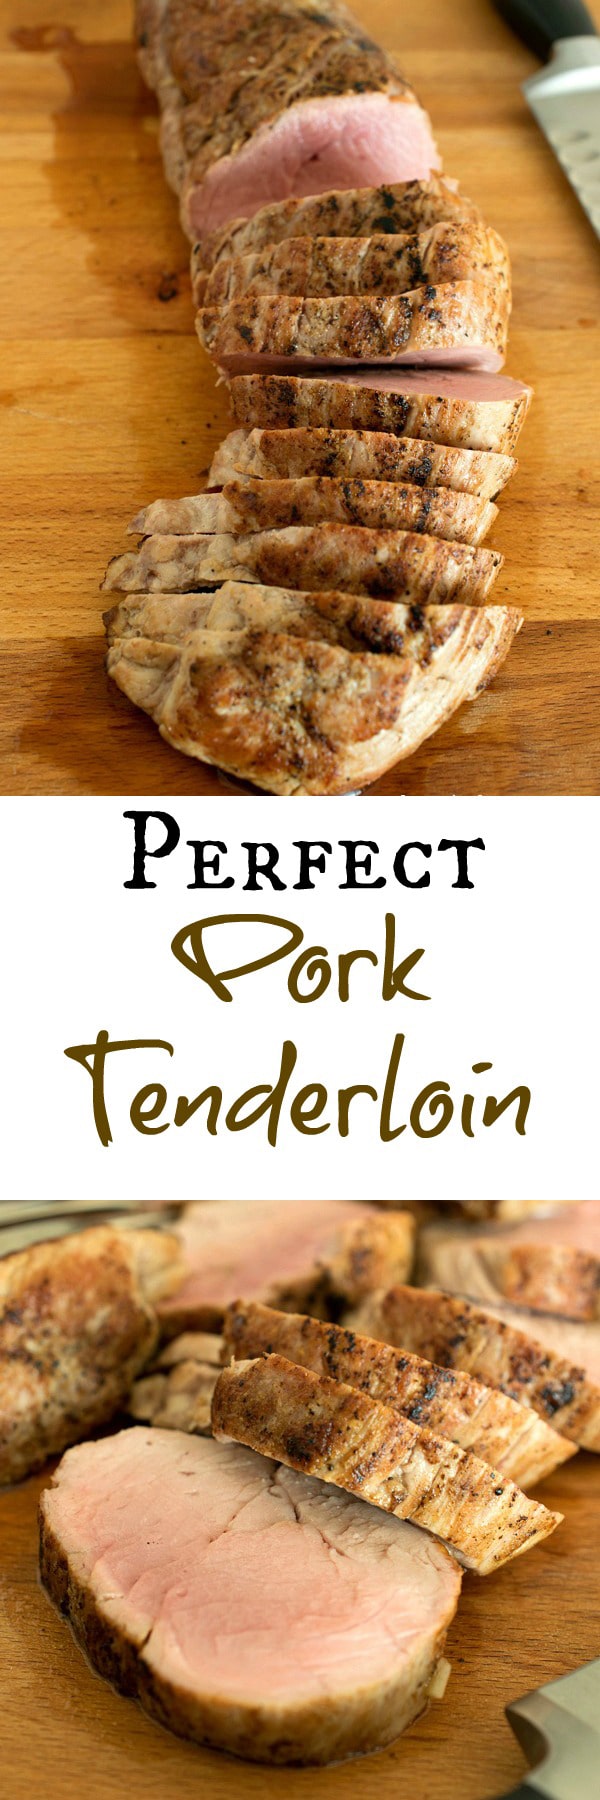
- Depending on the size of the tenderloin, it should take between 10 and 15 minutes. If small, test after 10 minutes by poking the fattest part. If you make a loose fist and push on the fatty part of your palm just below your thumb, it should feel like that. If it doesn’t bounce back, leave it in the oven for up to five more minutes.
- Note: We like our tenderloin medium rare. That said, if you prefer well cooked, have at it. In all cases, please follow guidelines recommended by the US department of agriculture.
- The cooking time is not an exact science so using a probe thermometeris a must. After the allotted time, insert a probe thermometer into the thickest part of the meat and check the temperature. For medium rare, remove the tenderloin at 135 degrees F. For medium to medium well, remove between 135 degrees F and 140 degrees F. The pork will continue to cook for about 10 more degrees outside of the oven and will stop cooking after that. Our 1 ½ pound pork tenderloin was removed from the oven at the 14 minute mark at 135 degrees F and stopped cooking at 147 degrees F. The meat was slightly pink but not rare.
- Once out of the oven, place on a cutting board and loosely tent with foil. To retain the juices and raise to at least the recommended US department of agriculture cooking temperature of 145 degrees F, it must rest between 5 and 10 minutes. We let ours rest ten minutes but I checked the temperature after five. At the five minute mark for resting, the temperature climbed from 135 to 147. At ten minutes it was still at 147. At 15 minutes it had dropped to 143. So optimally, you should be carving it no sooner than five but no later than ten minutes.
- Carve into thick slices and serve with your favorite pan sauce.
- To make a quick pan sauce, after removing pork from fry pan, place pan over burner and add ¼ cup white wine to deglaze. Once the wine is down to a few tablespoons, add two tablespoons of cold butter and remove pan from heat. Stir butter in until it melts then stir and serve over pork slices.


Disclosure: This post contains affiliate links.
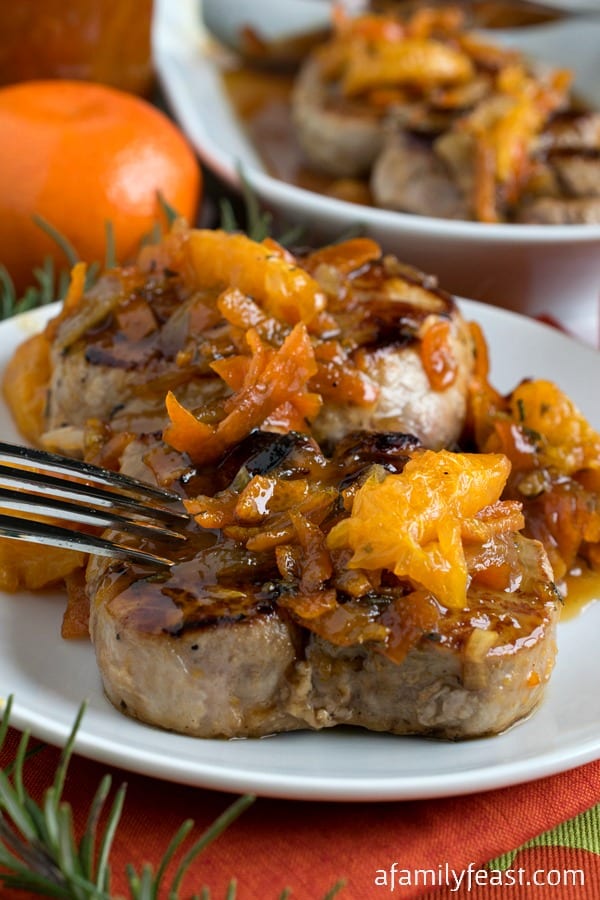
You may also like:
Mandarin Pork Tenderloin Medallions


Thank you for the pork tenderloin recipe.
Very thorough instructions!
You’re welcome Joan!
Extremely yummy – made this exactly as written for dinner last night, and it was moist & succulent and the accompanying sauce was to die for (made a double batch to drizzle over our mash!) Thanks!
You’re welcome Olivia! Glad you enjoyed the recipe!
This recipe was amazing! I followed it completely but added baby carrots and a medley of thinly sliced sauteed onions.
Thank you so much for sharing.
You’re very welcome Alexis – glad you enjoyed the recipe!
This turned out amazing. Pan frying made it so crispy and then the oven and tenting kept it juicy.
Thanks Aisha! Glad you enjoyed the recipe!
Have always been hesitant about roasting a pork loin filet. Searched & searched for the right recipe that spoke to me and yours was the one I chose. Came. Out. Divine. Husband & children gave rave reviews! Thank you!
You’re welcome Jessica! Glad the recipe was a success!
I grew up with this method, but wanted to leave a review to encourage skeptics – it’ll turn out perfect, I promise! Even if you’re like me and HAVE to wait til commercial break to remove from the oven.
Martha – I havent come across the 10-min-chicken method on your site, do you have it up? It is also a failproof method for for tender, melt in your mouth chicken breast that is utter perfection!
Heat cast iron or other heave-bottomed pan over high heat. Meanwhile, coat boneless skinless chicken breast in seasoned flour (whatever you fancy, but be heavy handed with the seasoning! I use Morton’s Nature’s Seasoning, garlic and onion powder, smoked paprika, dash of corriander, and lots of rosemary.) Add a tablespoon of oil to your pan, once oil is shimmering, place chicken breast pieces in. Let brown 1 1/2 minutes, flip, let brown 1 more minute. Cover, reduce heat to low and let cook for 10 minutes. WITHOUT REMOVING LID transfer pan to unused burner, let sit for an additional 10 minutes. Slice thinly and serve!
Recipe requires a bit of trust – do not touch that lid once on until its time to slice! Also, makes the most delectable pan gravy you’ve ever had.
Hope you add to your site! I love sharing these “failproof” methods with people, and reducing the amount of people in the world that make dried out pork/chicken!
Thank you so much Holly! I have to admit, I’ve never heard of the 10-minute-chicken method but we’ll definitely give it a try! Thank you so much for sharing! It sounds delicious! (And who knows…maybe we will add it here, giving our nice reader Holly all of the credit!) 🙂 Thanks again!
Sooooo good! This is in my regular rotation. Loved the step by step instructions. I haven’t made pork tenderloin any other way since I found this recipe 6 months ago! Thank you!!
You are very welcome Heather! So glad you found us 🙂 and the recipe!
Thank you for your precise directions for this recipe. Simple, no special ingredients, yet so tender and flavorful. My cast iron pan had nothing in it when I took out the tenderloin to rest, but I poured in the wine anyway, and then the cold butter, and, Voila! an awesome pan sauce miraculously appeared!
You’re very welcome Jean! So glad you enjoyed the recipe!
Martha,
After overcooking pork tenderloin too many times to count, I used your recipe last night with great success. I have a sad “not funny” pork tenderloin story. While traveling in Germany during white asparagus season…it’s a festival actually… and eating the most wonderful food, I ordered pork tenderloin one night at dinner. When I cut into it I saw it was a bit pink. Growing up, I was told never to eat under cooked pork and I simply passed on trying it, only eating the white asparagus on my plate. Foolish girl!!!!
Can’t wait to make the spaghetti squash again…so delicious.
Oh no Linda! We both grew up being told the same thing… I’m sorry you missed out on the pork tenderloin on your trip. (I have a feeling it would have been amazing!)
When i was young I was told that you should cook pork well done because of triganosis. We dont have that anymore. So, now it is safe to eat it medium well.
That’s exactly right Kathleen – back in our earlier days, pigs were fed “slop” which (my understanding) was the source of the triganosis, but now, they are fed feed and other foods which don’t carry the disease.
Martha, what a hysterical story……..needed that laugh today! I will never look at pork without thinking of you! The photos are such a help, along with all the tips. Simple ingredients for a tender, juicy piece of meat. Pinned. Thanks for sharing.
LOL – I’m glad you enjoyed the post Mary! (As I still cringe a bit to this day!) 🙂 Have a great weekend!