This post may contain affiliate links. Please read our disclosure policy.
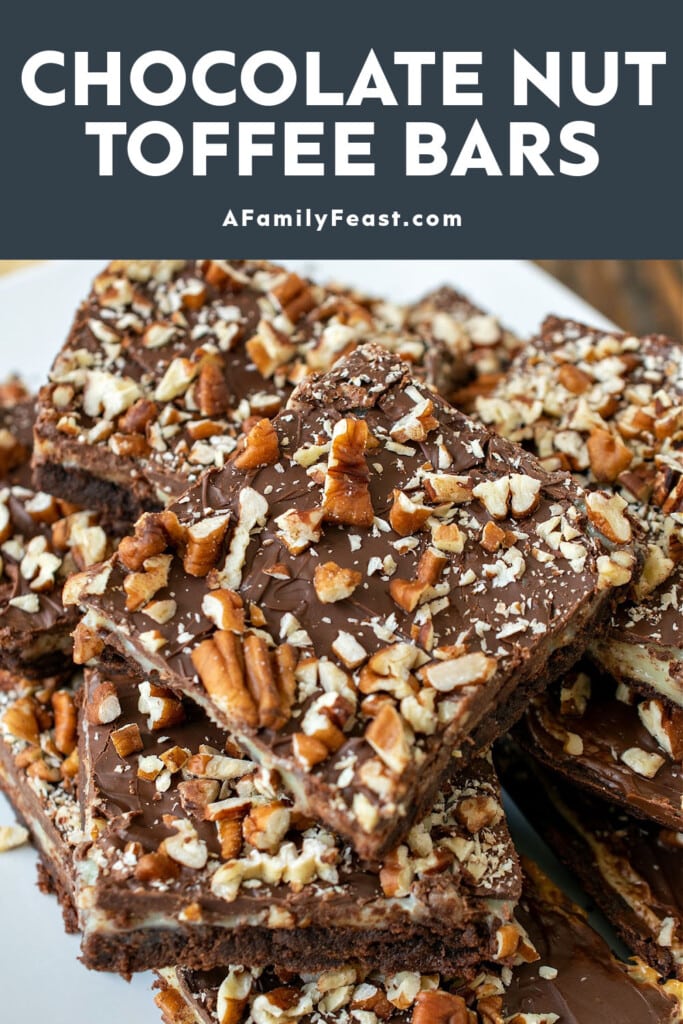
Chocolate Nut Toffee Bars have layers of chocolate, sweetened condensed milk, and more chocolate topped with nuts. This easy bar cookie is rich and delicious!

Chewy Chocolate Nut Toffee Bars
These sweet Chocolate Nut Toffee Bars have a rich and chewy chocolate bottom layer, a sweet and creamy layer in the middle, and melted chocolate and crunchy nuts on top. Served with a cold glass of milk, this is a perfect little treat.
This recipe for Chocolate Nut Toffee Bars came from a vintage magazine insert I found in my mother’s old recipe box. It promoted both Eagle brand sweetened condensed milk and Hershey’s chocolate products including their cocoa powder and chocolate chips.
My mom loved nutty chocolate desserts of any kind – and she loved easy recipes. So it’s no surprise to me that she saved this delicious recipe! (I’m glad she did!)

Why you’ll love Chocolate Nut Toffee Bars
- This recipe is super easy to make – and you might even have all of the ingredients on hand in your pantry.
- You can vary the chopped nuts on top to suit your tastes.
- The combination of the rich chocolate, crunchy nuts, and creamy filling is perfectly sweet!
Key Ingredients & Substitutions
- Butter – While we typically bake with unsalted butter, this vintage recipe called specifically for salted butter. (Salt can really enhance and balance the sweetness in a dessert recipe.) If you only have unsalted butter on hand, use that and add a small pinch of table salt as well.
- Powdered Sugar – Also known as confectioners’ sugar.
- Unsweetened Cocoa – The original recipe called for Hershey’s Cocoa Powder but Rodelle is another delicious unsweetened cocoa powder that can be used.
- Sweetened Condensed Milk – The original recipe called for Eagle Brand.
- Vanilla Extract
- Semi-Sweet Chocolate Chips
- Nuts – The original recipe called for chopped pecans or walnuts, but any other chopped nut will work such as almonds or pistachios.
Special Tools Needed
- 9×13-inch Glass Baking Dish – A Pyrex baking dish works great.
- Non-Stick Cooking Spray or Shortening – Either can be used to grease the baking dish.
- Cutting Board and Sharp Knife
- Various Measuring Cups and Spoons
- Mixer and Mixing Bowl – You can use a stand mixer or a hand mixer for this recipe.
- Rubber Scraper
- Medium Saucepan
- Whisk
- Offset Spatula or Large Spoon – This will be used to spread the chocolate on top.

How do I make Chocolate Nut Toffee Bars?
- Mix the bottom chocolate layer.
- Press into a greased baking dish and bake for 15 minutes.
- Mix sweetened condensed milk and butter in a saucepan and cook until slightly thickened.
- Pour the mixture over the baked chocolate layer and spread to the edges of the pan.
- Bake 10 minutes more until very lightly golden in color.
- Remove the dish from the oven and sprinkle chocolate chips over the top while still hot from the oven.
- Let sit for about a minute so the chocolate chips start to melt, then use an offset spatula or large spoon to spread the melted chocolate to the edges of the baking dish.
- Sprinkle chopped nuts all over the top of the chocolate.
- Let cool to set, then cut into portions for serving.

Tips & Tricks
Once the baking pan comes out of the oven, it’s important to move fast and sprinkle the chocolate chips over the top so the residual heat from the oven melts the chocolate. After waiting about a minute, you’ll see that the chocolate chips have started to soften – at this point you can spread the melted chocolate to form a top frosting-like layer. Immediately sprinkle chopped nuts to the top while the chocolate is still soft.
Frequently Asked Questions
- Can I make Chocolate Nut Toffee Bars ahead of time? Yes – in fact, you’ll want these bars to set up before you cut them for serving.
- How do I store leftovers? Store at room temperature for up to three days.
- Can I freeze? We haven’t tried freezing these ourselves, but as long as you wrap them tightly, I think they should freeze well.
You might like these other Chocolate Recipes:
Click here for more delicious Dessert Bar Recipes!
See the RecipesWe love seeing what you made! Tag us on Instagram at @afamilyfeast or hashtag #afamilyfeast so we can see your creations!

Chocolate Nut Toffee Bars
Chocolate Nut Toffee Bars have layers of chocolate, sweetened condensed milk, and more chocolate topped with nuts. This easy bar cookie is rich and delicious!
Ingredients
1 cup salted butter, softened (divided)
1 cup powdered sugar
1 1/4 cup all-purpose flour
1/3 cup unsweetened cocoa powder
1 (14-ounce) can sweetened condensed milk (NOT evaporated milk)
2 teaspoons vanilla extract
1 cup semi-sweet chocolate chips
1/2 cup chopped pecans or walnuts
Non-stick cooking spray or shortening
Instructions
- Preheat oven to 350 degrees F.
- Grease a 9×13-inch glass baking dish.
- Set aside 2 tablespoons of the softened butter to use later in the recipe.
- In large mixing bowl, beat remaining butter and sugar on high speed until fluffy.
- Add flour and cocoa powder, mix well.
- Press the cocoa mixture into the bottom of the greased baking dish.
- Bake in the preheated oven for 15 minutes.
- While the cocoa mixture bakes, place the reserved 2 tablespoons of butter in a medium saucepan along with the sweetened condensed milk.
- Cook on medium to low heat, stirring frequently, until mixture thickens slightly, about 15 minutes.
- Remove the condensed milk mixture from the heat and stir in vanilla.
- Pour over the baked chocolate crust.
- Bake 10 minutes longer, or until slightly golden brown.
- Remove the baking dish from the oven. Immediately and evenly top with the chocolate chips.
- Let the dish stand for about one minute, allowing the chocolate chips to soften and melt. With an offset spatula or the back of a large flat spoon, smooth out the melted chocolate in an even layer, all the way to the edges of the baking dish. It’s important to do this step while the chocolate chips are still warm, so it creates an even frosting on top.
- Immediately sprinkle the top of the chocolate with chopped nuts.
- Cool then cut into bars for serving.
- Store covered at room temperature.
Last Step! Please leave a review and rating letting us know how you liked this recipe! This helps our business thrive & continue providing free recipes.



Leave a Comment