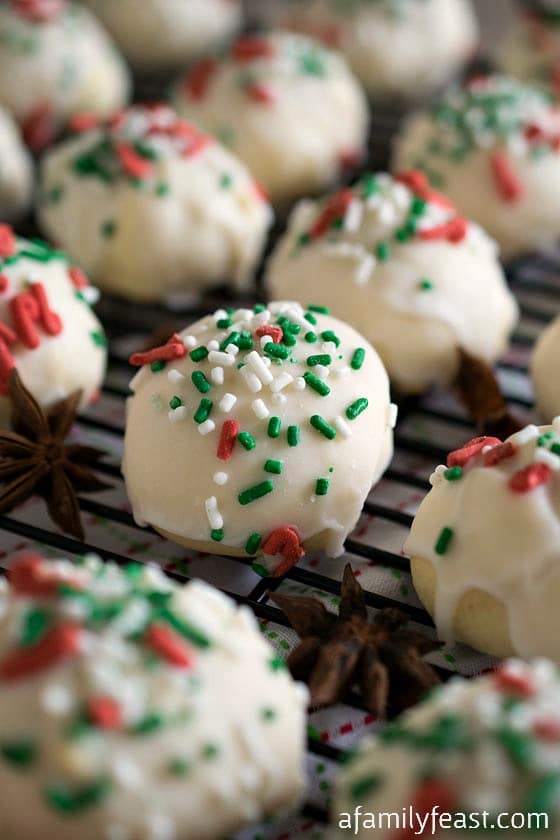
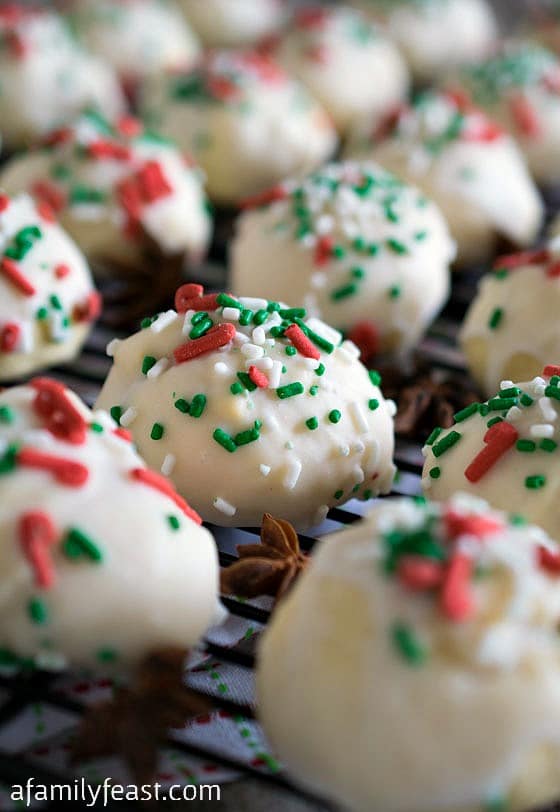
There’s something about Italian Anisette Cookies that is quintessential Christmas to me, as well as my husband Jack. Growing up, Jack remembers eating and loving these cookies as part of his Italian family holidays! And, although my family is Polish, every Christmas we’d visit my Aunt Bertha (who married an Italian guy) and she makes some of the best Italian foods around! Italian Anisette Cookies – with their distinct, sweet flavor – were always part of the cookie tray on her dessert table.
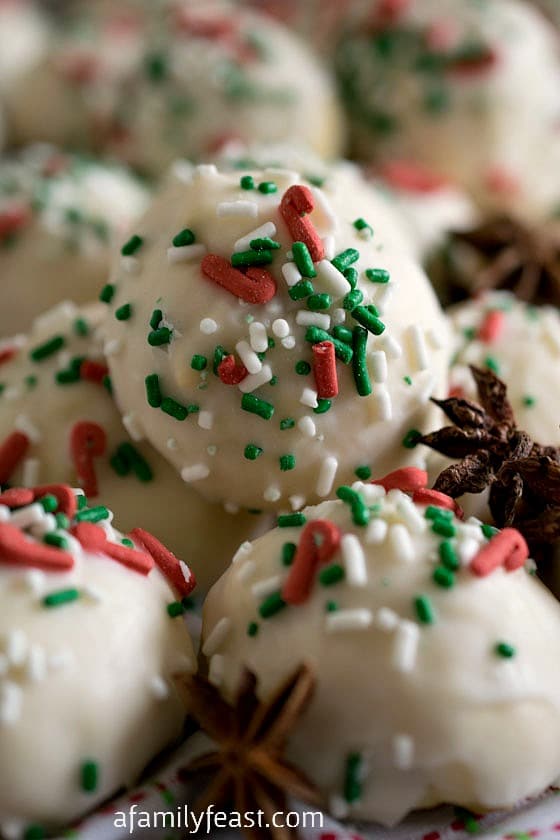
And to help you fill up your holiday cookie tray today – we’re participating in a virtual cookie exchange! In addition to sharing our Italian Anisette Cookie recipe with you today, at the bottom of this post are links to 16 other delicious holiday cookies from some of my best food blogger friends!
And because nothing goes better with cookies than a glass of milk, please also consider supporting Cookies for Santa’s Milk Drive in partnership with the Great American Milk Drive and Feed America.
Did you know that:
- Milk is one of the most requested items at food banks, yet it is rarely donated.
- Of the 46-million Americans that food banks serve, the average person gets less than 1 gallon of milk per year.
- The entire dairy industry from dairy farmers to dairy processors has come together and joined with Feeding America food banks to help get milk to those who need it most.
Please visit santasmilkdrive.com where you can donate a gallon of milk to a local food bank in your own community! And, for every donation of a gallon of milk made through December 31st, 2014 the Great American Milk Drive will match it – gallon for gallon! You can learn more by clicking here. #SantasMilkDrive
And don’t forget to scroll below for more incredible cookie recipes!
PrintItalian Anisette Cookies

- Prep Time: 15 mins
- Cook Time: 10 mins
- Total Time: 25 minutes
- Yield: 40 cookies 1x
- Category: desserts
- Method: baking
- Cuisine: Italian
Ingredients
1/4 cup unsalted butter, softened to room temperature
2 tablespoons room temperature vegetable shorting
2 tablespoon vegetable or canola oil
3/4 cup granulated sugar
4 eggs, room temperature
1 tablespoon anise extract
4 cups flour
4 1/2 teaspoons baking powder
1/3 cup whole milk at room temperature
Icing
4 cups confectioners’ sugar
1 tablespoon anise extract
1/3 –1/2 cup room temperature milk
Red, green and white jimmies or sprinkles
Instructions
- In the bowl of a stand mixture with paddle attachment, cream butter, shortening and oil for two minutes until fluffy. Add sugar and blend for two more minutes.
- Add one egg at a time with mixer on low. Then add extract and combine.
- In a separate bowl, sift flour and baking powder.
- With mixture on low, alternate adding flour and milk to combine. Scrape bowl and mix again.
- Dough should be soft, a bit sticky but easy to manage.
- Preheat oven to 375 degrees with rack in upper third of oven.
- On a floured surface, scrape out dough and knead by hand for two minutes.
- Using a #40 ice cream scoop (Equivalent to 2 tablespoons), scoop right from the counter onto parchment lined sheet pans or cookie sheets about two inches apart. Roll each into balls between your palms after scooping each pan. Tap counter with pan so they go flat on the bottom and dome shaped on top. Work in batches baking one pan at a time.
- Bake for ten minutes, and cool on wire racks once they come out. Bake remaining pans, cooling all before going to next step.
- To make the icing, in a medium bowl, place powdered sugar and anise extract, whipping to combine. Then slowly add enough milk to make a thick and creamy icing. Too thin and it will run off cookie, too thick and you will not be able to dip the cookies. Use more or less milk or powdered sugar to get proper consistency.
- Use the same parchment lined pans and place cooling rack over them. Prepare a work station by having cooled cookies, rack and parchment lined pans, glaze and sprinkles lined up. One at a time dip top of cookie in glaze then set on rack so glaze drips onto pan below. Do about four at a time, stop and sprinkle the tops with the candy sprinkles. Keep on doing four at a time until done then let sit at room temperature for an hour to let the glaze set up.
- After the glaze sets up, you can pick them up without getting sticky fingers. Cover with plastic wrap and store at room temperature.
- We made these at night and by the next morning; they were perfect and even seemed to have better flavor and texture. That being said, you should eat or serve these within a day or two, as they will get stale fast. You should not refrigerate.
Notes
One of the keys to this recipe is making sure that the ingredients are at room temperature before mixing. Also – we think the flavor of these cookies improves if you allow them to sit overnight. But be sure to store unrefrigerated in an air-tight container to prevent the cookies from getting stale.
You may also like:

Caramel Filled Chewy Ginger Cookies from 365 Days of Slow Cooking
Cranberry Orange Nut Cookies from Apron Strings
Orange Cranberry White Chocolate Stuffed Cookies from Barbara Bakes
Soft Pumpkin Cookies + Pumpkin Spice Kisses from Bless this Mess
Soft Maple Sugar Cookies from Crumbs and Chaos
Graham Cracker Log from Hoosier Homemade
Rugelach Bars from Let’s Dish
Pepper Jelly Cornmeal Thumbprints from Letty’s Kitchen
Chocolate Peanut Butter Cup Cookies from Love from the Oven
Linzer Cookies from Mandy’s Recipe Box
Surprise-inside Christmas Stocking from Munchkin Munchies
Chocolate M&M Cookies from Oh, Sweet Basil
White Chocolate Pecan Snowball Cookies from Rose Bakes
Chocolate Toffee Cranberry Cookies from Taste and Tell
White Chocolate Cherry Almond Bars from Your Homebased Mom
Spiced Eggnog Cookies from Will Cook for Smiles

What if I don’t have a mixer with a paddle. I really wasn’t to make these cookies?
Hi Natalie – A hand-held mixer will also work (just use the regular beaters not the whisk attachment if it has one)!
These are the cutest little cookies ever.. I bet they tasted delicious too! Perfect for Christmas!
Thanks Thalia!
Oh, but I sure do remember these cookies from home! What a classic, and yours look absolutely perfect.> Merry Christmas to you, and let the baking begin!
Thanks Adri!! Merry Christmas to you too!
I’m going to have to try these because I love anise!
These sound delicious, and they look so festive too!
I love traditional cookies! Especially when they come with memories!
These cookies are so cute and they sound delicious!
I’ve never heard of anise extract… but they look terrific so I can’t wait to try!!
Such cute cookies!! I love everything that comes from your kitchen 🙂
These cookies are too darn cute, I just love them!
Thanks Lynn!